Showing posts with label Small Project. Show all posts

22 October 2023

Goldilocks bags!

Yup, that's right, BAGS!

First up I used the round Goldilocks to make a half round bag.
 
Making just half the circle until it was wide enough, then switching to straight rows across the top for a wee bit more height. 

Then I made a meshy style bag in black. I used an 8mm hook here to get a loose mesh.
I started with the round pattern for 6 rows and then continued on with no increase (ie the straight pattern)

 
Here it's flat and here stuffed full with my favourite big blankie.

For a bigger market style bag (on the to do list!) I'll try going to 9 round rows first and see how that turns out.

SO many options!


Links:
Blanket patterns Ravelry
Previous posts start here

10 August 2023

Hobo Bag

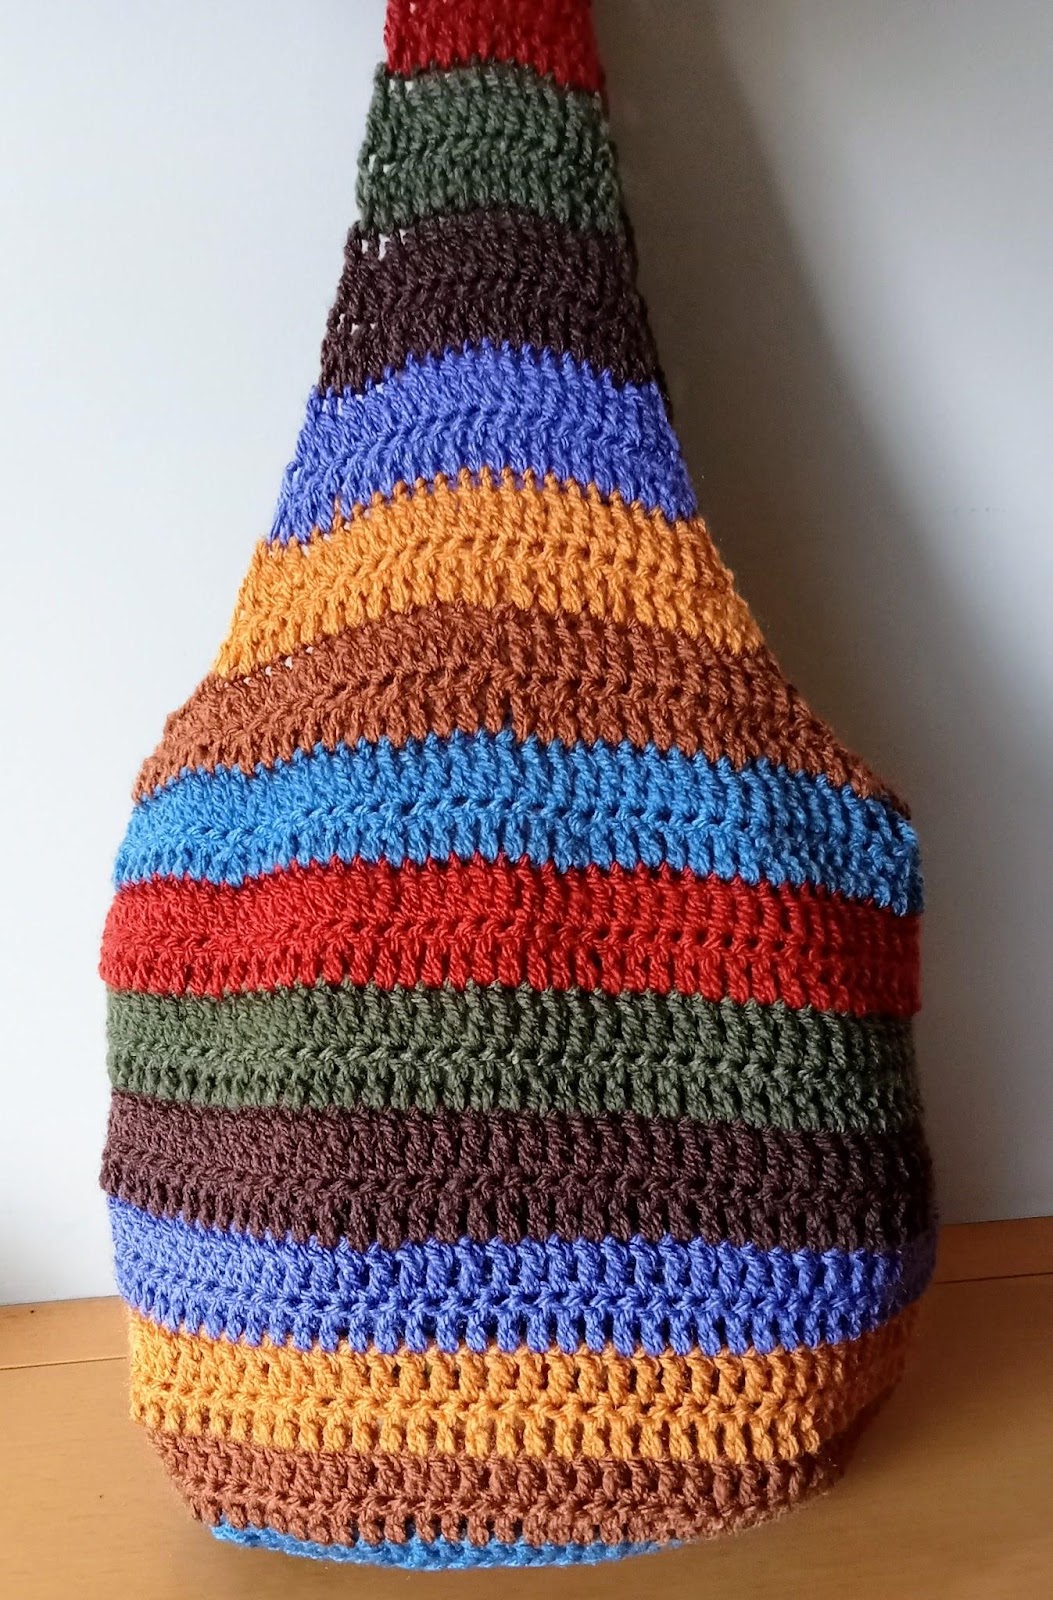
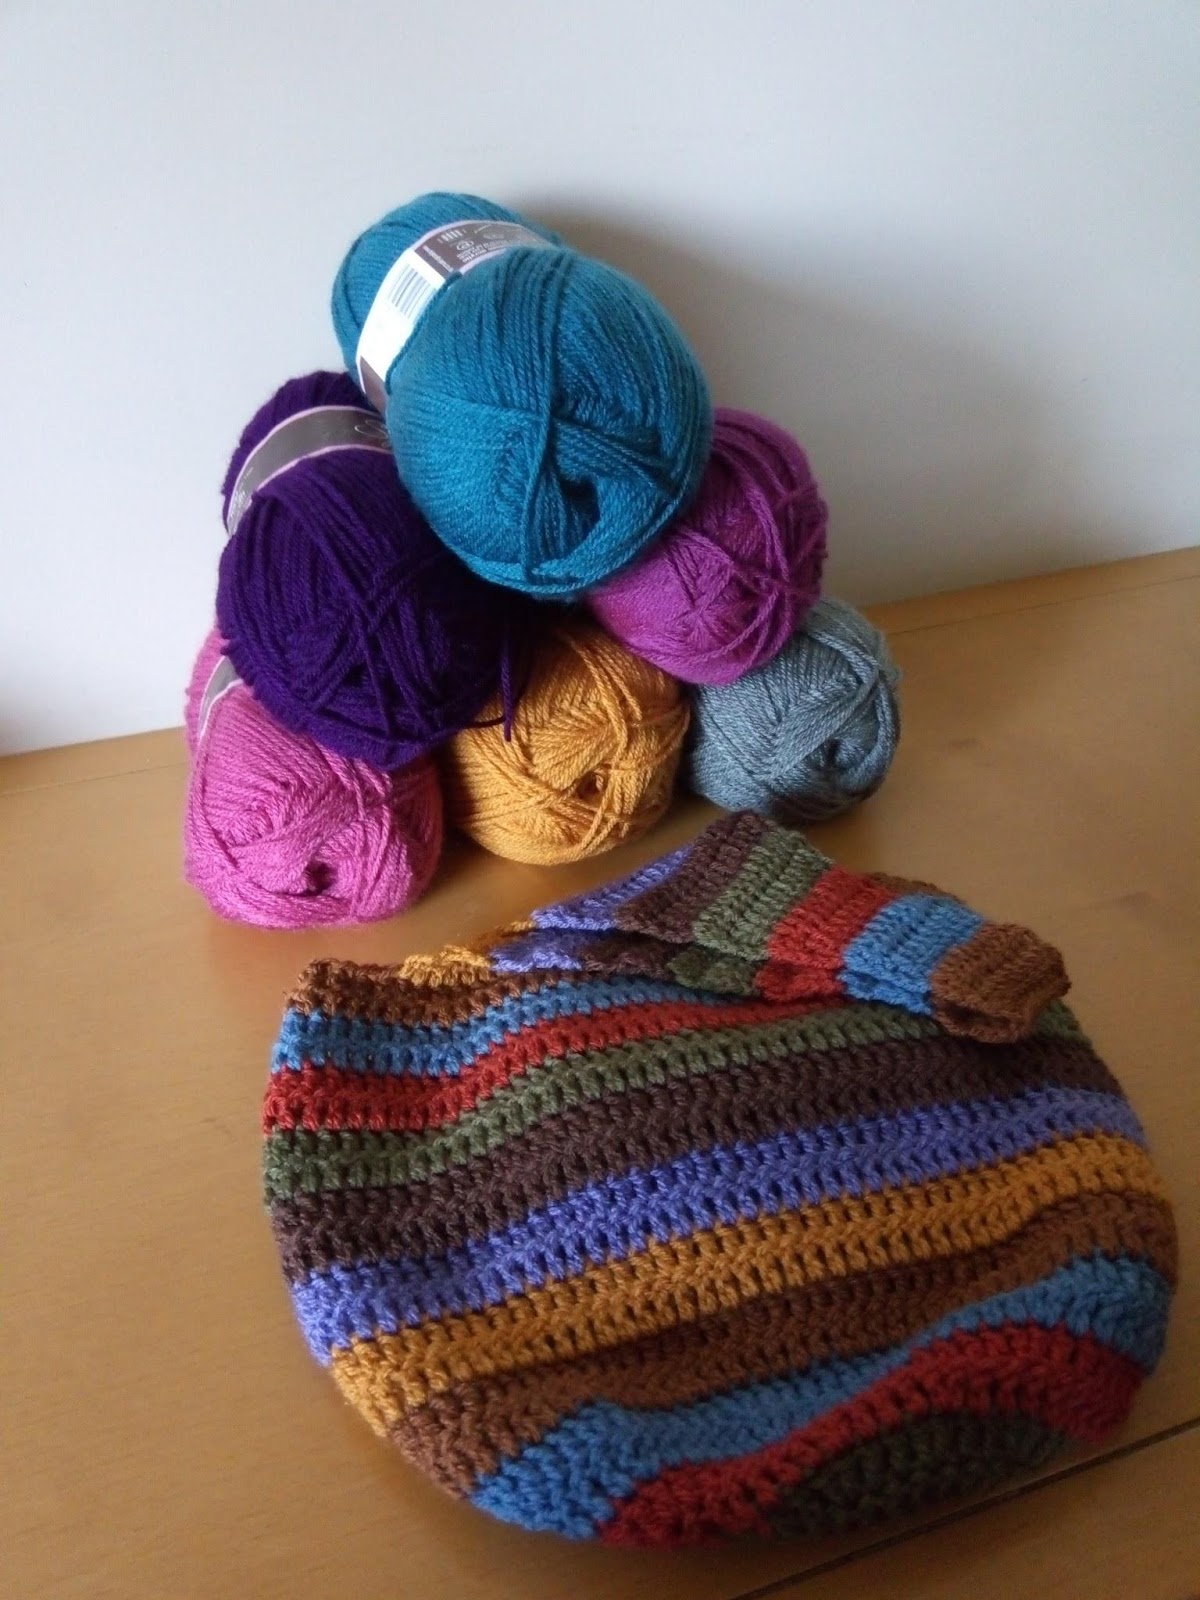
 My favourite Hobo Bag


I know, I know, there are lots of lovely slouchy hobo bucket bags around.

And here is mine!

It's the one I make again and again.

The bag part is about 30cm x 30cm flat plus handle/strap, but will stretch out to nearly 40cm!


What you need:

4mm hook

Hand bag: 75g Stylecraft Special DK 

Cross body bag: 85g Stylecraft Special DK


Link to PDF on Ravelry.


Pattern:

Start: Ch3, join with slip stitch (JSS) to form a ring. You can also use a magic circle but I prefer the more sturdy chain ring start for a bag.

Row 1. Ch3, 11dc into ring, JSS, turn. = 12 stitches

Row 2. Ch3, dc in same stitch, 2dc in each stitch around, JSS, turn. = 24 stitches

Row 3. Ch3, dc in same stitch, (1dc in next stitch, 2dc in next stitch)x 11, 1dc in last stitch, JSS, turn. = 36 stitches

Row 4. Ch3, dc in same stitch, (1dc in next 2 stitches, 2dc in next stitch)x 11, 1dc in 2 remaining stitches, JSS, turn. = 48 stitches

Row 5. Ch3, dc in same stitch, (1dc in next 3 stitches, 2dc in next stitch)x 11, 1dc in 3 remaining stitches, JSS, turn. = 60 stitches

Row 6. Ch3, dc in same stitch, (1dc in next 4 stitches, 2dc in next stitch)x 11, 1dc in 4 remaining stitches, JSS, turn. = 72 stitches

Row 7. Ch3, dc in same stitch, (1dc in next 5 stitches, 2dc in next stitch)x 11, 1dc in 5 remaining stitches, JSS, turn. = 84 stitches

Row 8. Ch3, dc in same stitch, (1dc in next 6 stitches, 2dc in next stitch)x 11, 1dc in 6 remaining stitches, JSS, turn. = 96 stitches


Row 9-20. Ch3, dc in next stitch all around, JSS, turn. = 96 stitches


Row 21. Ch3, dc in next 5 stitches, 2dc together, (1dc in next 6 stitches, 2dc together)x 11, JSS, turn. = 84 stitches

Row 22. Ch3, dc in next stitch all around, JSS, turn. = 84 stitches


Row 23. Ch3, dc in next 4 stitches, 2dc together, (1dc in next 5 stitches, 2dc together)x 11, JSS, turn. = 72 stitches

Row 24. Ch3, dc in next stitch all around, JSS, turn. = 72 stitches

Split for handles:

Row 25. Ch3, 2dc 2 together, 1dc in next 20 stitches,  2dc 2 together, 1dc, turn leaving remaining stitches unworked (for now) = 24 stitches.

Row 26. Ch3, 2dc 2 together, 1dc in next 18 stitches, 2dc 2 together, 1dc, turn = 22 stitches

Row 27. Ch3, 2dc 2 together, 1dc in next 16 stitches, 2dc 2 together, 1dc, turn = 20 stitches

Row 28. Ch3, 2dc 2 together, 1dc in next 14 stitches, 2dc 2 together, 1dc, turn = 18 stitches

Row 29. Ch3, 2dc 2 together, 1dc in next 12 stitches, 2dc 2 together, 1dc, turn = 16 stitches

Row 30. Ch3, 2dc 2 together, 1dc in next 10 stitches, 2dc 2 together, 1dc, turn = 14 stitches


Row 31. Ch3, 1dc in next stitch across, turn = 14 stitches. 

Row 32. Ch3, 2dc 2 together, 1dc in next 8 stitches, 2dc 2 together, 1dc, turn = 12 stitches 

Row 33. Ch3, 1dc in next stitch across, turn = 12 stitches. 

Row 34. Ch3, 2dc 2 together, 1dc in next 6 stitches, 2dc 2 together, 1dc, turn = 10 stitches


Hand bag:

Row 35-38. Ch3, 1dc in next stitch across, turn = 10 stitches. 

Fasten off.


Shoulder bag:

Row 35-55 (approx). Ch3, 1dc in next stitch across, turn = 10 stitches. 

Fasten off.


Crossbody bag:

Row 35- 65 (approx). Ch3, 1dc in remaining stitches, turn = 10 stitches

Fasten off.


Second side:

Go back to row 24 and skipping 10 stitches, reattach yarn. Work rows 25- 38, 55 or 65 as before.

Before you fasten off the second side slip stitch the 2 handles together taking care not to twist them!

If you want to try it out for size before you cut the yarn, be sure to give it a good hard stretch before you measure, or load it up and try it on. It can be alarmingly stretchy!


Job done!


Making it a different size:

To make it wider or narrower; work more or less of the increase rows.

To make it longer or shorter; work more of less of the straight rows.

You can change to a smaller hook to make a tighter thicker fabric or a bigger hook to make a looser, more net like fabric.


Remember: it’s crochet, it will stretch!

Which I think is really the whole point of a good crochet hobo bag.  ðŸ˜‰


Let's see how much I can shove in it…

Yup, that’s 6 full balls of Stylecraft Special dk 100g to fill it right up.


Bonus pouch:

Row 1. Ch 24 + 3 for turning = 27ch.

Row 2. Dc in forth ch and along to end, turn and work down the other side of chain, JSS, = 48 stitches.

Row 3- 15. Ch3, dc in each stitch around, JSS. = 48 stitches.

Fasten off. Add a zipper or a button closure if desired.


You can either sew this on, leave it loose in the bag or clip it on so you can move it between bags if you have more than one that you use.

I tried velcro, putting the scratchy part on the pocket and the fluffy part on the bag. That way if I wasn’t using the pocket the bag didn't have a nasty scratchy patch on it!


18 June 2023

Squishy Bear

 Squishy Bear.

It has a name!

See previous posts for the evolution of this squishy snuggler. 

Post 1: design phase

Post 2: better bears and lots of photos

Here is the pattern in brief and you can get it with construction photos from Ravelry.


Eyes.
I like the look of button eyes and feel they are easier to secure than so called safety eyes. Especially here where we use hdc stitches. The safety eyes would be very easy to wiggle out.
I use 2 separate pieces of yarn to attach each eye and knot each one, so even an avid chewer would have to get through both bits to get the thing off.  
And it's acrylic - that ain't a nice chew!
Alternatively, you can make a crocheted eye, with 8hdc in a magic circle and sew on. So that's a nice soft eye.
I did that on Raspberry Squish.


If you want the full pattern with photos and explainers:
Buy now from Ravelry


Final Bear

I made and undid a couple more and then made 3 with the final pattern.

First post Design phase

So I'm happy with how it works now.

Photo shoot time!


                    Mocha Bear                    &  the well known WWW unit of measuring

 this is the drifter yarn I mentioned last time 
I tried a different mouth - I need to not do that one ever again. :(

 
Two pals playing around! 
Drifter is the same size as mocha. It just squunched up.


This is Raspberry Squish! 
Sooo Squishy and snuggly and cuddles!


05 June 2023

Wayuu #2

Here is the second Wayuu style bag I made.
It's in the King Cole Cotton and I used a 4mm hook.
I've done it flat and will put a zipper in it at some point.
It's still not quite what I wanted though....
                                                                        ... do another one then!


21 May 2023

Wayuu bag

 Here's the bag I made first!

 and the base...

 
Geez, I didn't place the holes very well, did I!                             and here's what's inside! the 4 balls left over.


I used 4 Seasons Flinders 8 ply cotton and a 3.5mm hook.
The bag is a wee bit small for what I wanted, so  oh dear I'll have to make another one!

This 8ply cotton is a bit thinner than the King Cole 8 ply cotton and is more tightly wound so I think it's slightly better. And I can get it locally I don't have to wait 6-8 weeks for a delivery from the UK at the moment. It used to be a week - week and a half maybe.

Still. I have a pile of King Cole to use up so I'll do the new bag in that.


30 April 2023

Frisbee's!

Ages ago I made a Frisbee or 5... they're quite addictive as they don't take long to make and everyone steals them, or they go behind a thing and get lost for a while.

So while I had my new cottons out I thought I would make a cotton one to see how it compares to the acrylic ones.
Despite using the same hook, it came out smaller and although cotton has a heavier feel, it was lighter.
It still flies though, and that's all it needs to do!
It wouldn't be as easily washable as an acrylic one, they can just go in the laundry. A cotton one would best be hand washed, I think.

Anyway here is the link to my pattern:

The cotton one.


Front and back

 
 Acrylic ones.


25 April 2023

Tapestry Crochet Bag

 A nice stash of cotton arrived on Friday!
It's King Cole cotton soft DK.

I dived in and started using it before taking a photo, but that's ok. Here's what's left after I made a bag.


This bag is made in the tapestry crochet style with a simple triangle design on a wide striped background. I used a 4.5mm hook for the body and a 4mm hook at the top and used about 115g of my new cotton.


For more on this style of crochet go check out Carol Ventura's work.
On Ravelry or her website

Such an interesting woman and she has loads of info on tapestry crocheting.
I got one of her books years ago and I see now it's on kindle, too. Even reading the free sample part is interesting!

This bag has a nice sturdy fabric which doesn't need lining. I might make a fabric 'pocket' though and attach it inside so my phone doesn't slide to the bottom of the bag, but otherwise all my other junk can just swim about in there.


02 April 2023

Patchwork Granny Part 3

 I haven't got very far!

I've been distracted by other projects unfortunately. Well that's ok, no hurry,

I did get a nice wee pile of big squares done ready to attache with the purple.


 And I made a nice coaster too. I need to replace my tatty old ones.
https://www.ravelry.com/patterns/library/diamond-daze-cosy--coasters


08 March 2023

Screaming souls scarf

A pretty lace scarf...or is it!
 
When you look closely it's actually tortured screaming souls, ha ha.


Here's the rough chart for it if you're interested.
I used a 4.5mm hook with some thin-ish (for me!) cotton yarn with no blinkin label!

02 March 2023

Cable hat

 Nothing says cosy in winter like a chunky cable hat with a pompom!

There are a few around to choose from.
I like this one from Yarnspirations caron-cable-twist-hat


Done in Meadow Stylecraft Special DK and a 5mm hook

This one didn't get a pompom yet - I want one of those fluffy bunny bum pompoms for this one.

These hats come out nice and thick with the use of post stitches.
And they work up pretty quick too!


16 February 2023

Diddle Dum Dolls

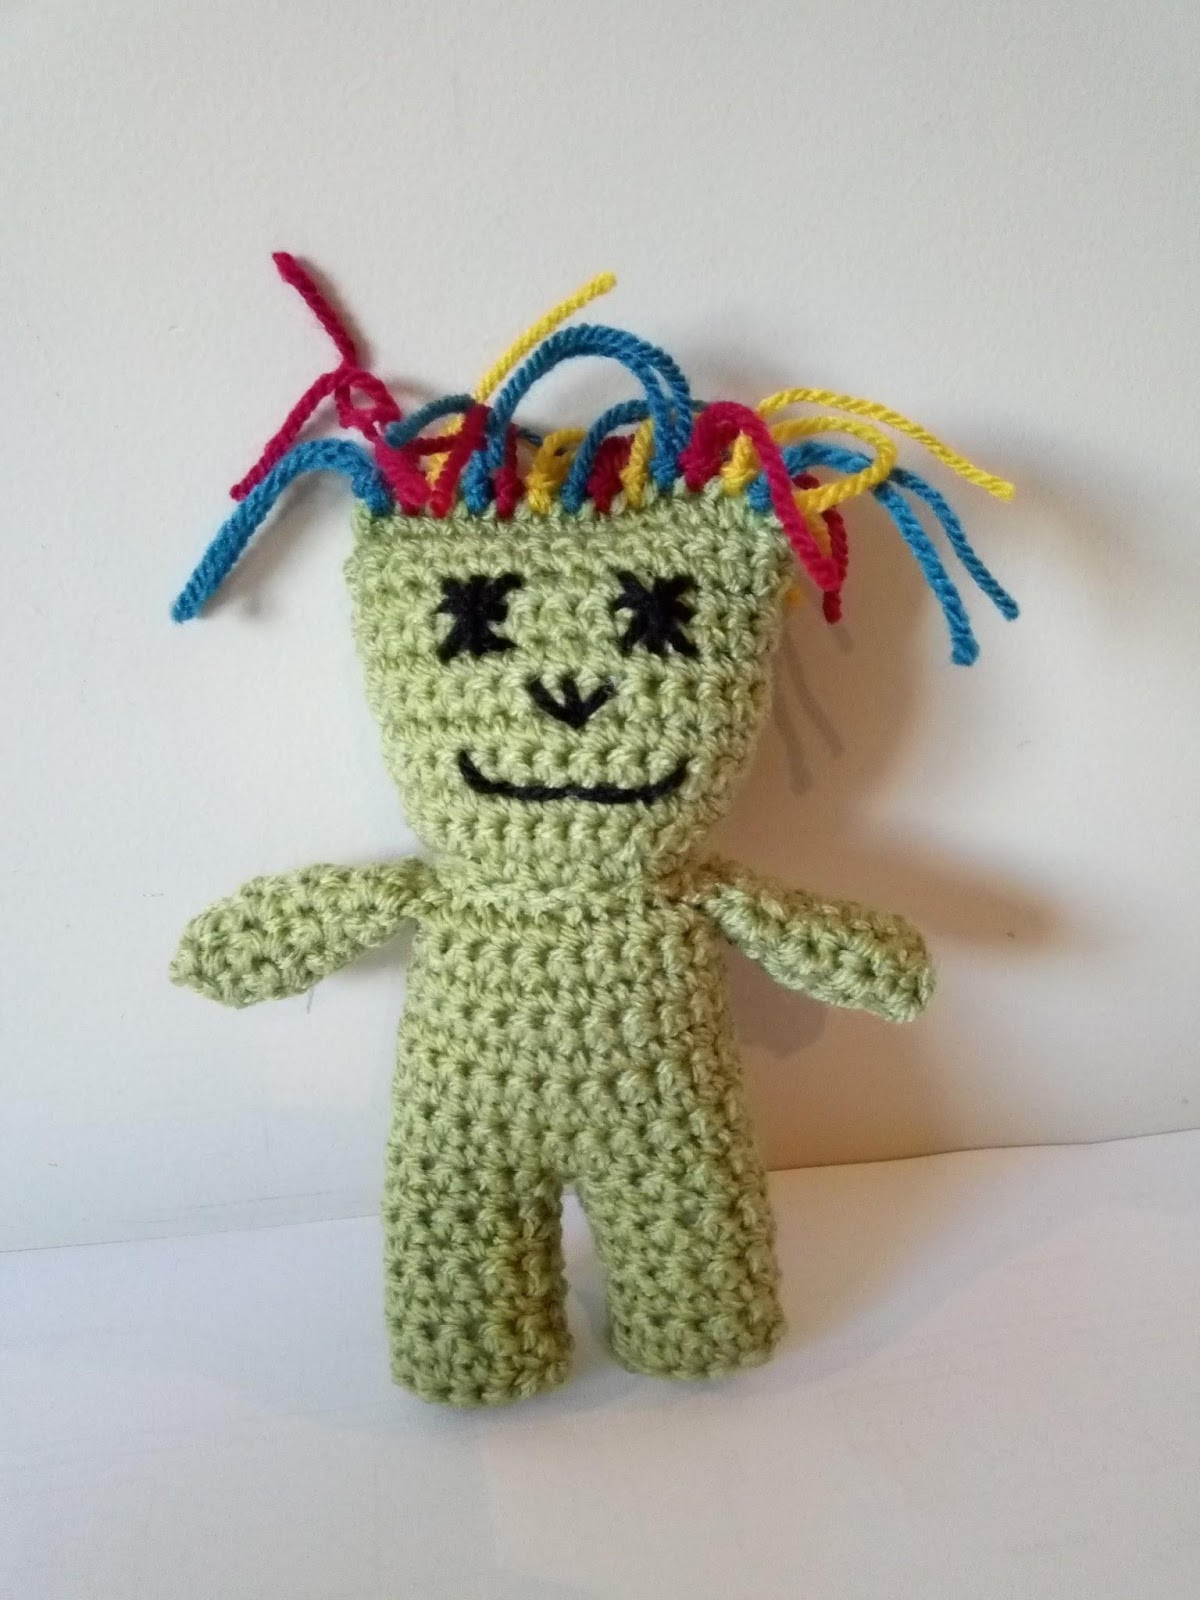
A bit daft to look at but they’re quick and simple to whip up.

Worked in the flat with a centre back seam, I can knock out a small one in about an hour and a half now.

This pattern is available as a free PDF at Ravelry


Contents:

Notes

Written pattern - Small Written pattern - Medium Written pattern - Large

Photo tutorial

Graph - Small Graph - Medium Graph - Large


Notes:

4mm hook with dk/8ply yarn

The arms are worked into the row before the neck.
I’m finding that easier than sewing them on afterwards, and they are centred to the side just right.
But you can sew them on if you prefer.


Approximate quantities/sizes:

Small Medium Large

15g of yarn 30g of yarn 90g yarn

5g of stuffing 15g stuffing 35g stuffing

15cm (6 inches) high 20cm (8 inches) high 28cm (11 inches) high


Written Pattern for Deedee Diddle Dum (Small)


Arms x2

1) ch9, turn and sc in second from hook and along to end . turn = 8st

2-8) ch1, 1 sc in each to end = 8st

Fasten off with a long tail for sewing 

Fold in half, sew down the side and along the bottom. Stuff just a wee bit.


Legs x2

1) ch13, turn and sc in second from hook and along to end . turn = 12st

2-8) ch1, 1 sc in each to end = 12st 

Fasten off first leg with a long tail for sewing.

For the second one continue:


Body

9) attaching in first leg: ch1, sc to end of second leg, and then along the top of the first leg to end = 24 st

10-17)  ch1, 1 sc in each to end = 24st 

18) Attaching the arms: ch1, 3sc. Over the next 4 sc also work through the first arm top as well.

Sc8 st, over the next 4 sc also work through the second arm top, sc 4 to end. = 24st


Neck

19) Ch1, dec x 11, 1sc = 13st

20) ch1, inc x 11, 1sc = 24st


Head

21) ch1, sc 4, inc,(sc5, inc)x3 = 28st

22-30) ch1, sc to end = 28st

Fasten of with long tail for sewing.


Sewing

I find it easier to first sew one leg.

Then I sew down the centre back and on down the second leg.

Stuff 

Re attach yarn at stitch 7 of the last row with a slipstitch and work in sc through both layers to the end.


Hair

Make 13 lengths of yarn and tie onto each stitch of the closing row.

The colourful one below is about 5 inches long and the shorter black hair is about 3 inches.


Face

Use a contrasting yarn to stitch some features on.

Done!


Written Pattern for Daffy Diddle Dum  (Medium)


Arms x2

1) ch13, turn and sc in second from hook and along to end . turn = 12st

2-12) ch1, 1 sc in each to end = 12st

Fasten off with a long tail for sewing 

Fold in half, sew down the side and along the bottom.

Stuff just a wee bit.


Legs x2

1) ch19, turn and sc in second from hook and along to end . turn = 18st

2-12) ch1, 1 sc in each to end = 18st 

Fasten off first leg with a long tail for sewing.

For the second one continue:


Body

13) attaching in first leg: ch1, sc to end of second leg, and then along the top of the first leg to end = 36 st

14-26)  ch1, 1 sc in each to end = 36st 

27) Attaching the arms: ch1, 5sc. Over the next 6sc also work through the first arm top as well.

Sc12 st, over the next 6sc also work through the second arm top, sc 6 to end. = 36st


Neck

28) Ch1, dec x 17, 1sc = 19st

29) ch1, inc x 17, 1sc = 36st


Head

30) ch1, sc 4, inc,(sc5, inc)x5 = 42st

31-44) ch1, sc to end = 42st

Fasten of with long tail for sewing.


Sewing

I find it easier to first sew one leg.

Then I sew down the centre back and on down the second leg.

Stuff 

Re attach yarn at stitch 11 of the last row with a slipstitch and work in sc through both layers to the end.


Hair

Make 22 lengths of yarn about 3- 5 inches long and tie onto each stitch of the closing row.


Face

Use a contrasting yarn to stitch some features on.

Done!


Flat hair, or spikey cool hair!

Or no hair at all.    


Written Pattern for Dappa Diddle Dum  (Large)


Arms x2

1) ch17, turn and sc in second from hook and along to end . turn = 16st

2-16) ch1, 1 sc in each to end = 16st

Fasten off with a long tail for sewing 

Fold in half, sew down the side and along the bottom.

Stuff just a wee bit.


Legs x2

1) ch25, turn and sc in second from hook and along to end . turn = 24st

2-16) ch1, 1 sc in each to end = 1sst 

Fasten off first leg with a long tail for sewing.

For the second one continue:


Body

17) attaching in first leg: ch1, sc to end of second leg, and then along the top of the first leg to end = 48 st

18-35)  ch1, 1 sc in each to end = 48st 

36) Attaching the arms: ch1, 7sc. Over the next 8sc also work through the first arm top as well.

Sc16st, over the next 8sc also work through the second arm top, sc 8 to end. = 48st


Neck

37) Ch1, dec x 23, 1sc = 25st

38) Ch1, inc x 23, 1sc = 48st


Head

39) ch1, sc 4, inc,(sc5, inc)x7 = 56st

40-60) ch1, sc to end = 56st

Fasten of with long tail for sewing.


Sewing

I find it easier to first sew one leg.

Then I sew down the centre back and on down the second leg.

Stuff 

Re attach yarn at stitch 14 of the last row with a slipstitch and work in sc through both layers to the end.


Hair

Make 26 lengths of yarn about 3- 5 inches long and tie onto each stitch of the closing row.


Face

Use a contrasting yarn to stitch some features on.

Done!

   Mr Stripey! Sitting in a bowl to get weighed- cute!
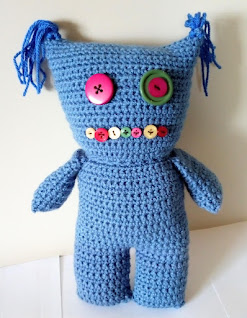
Mr or Miss Not-so-cute!


Photo tutorial for the small doll.

The other sizes are constructed in the same way.


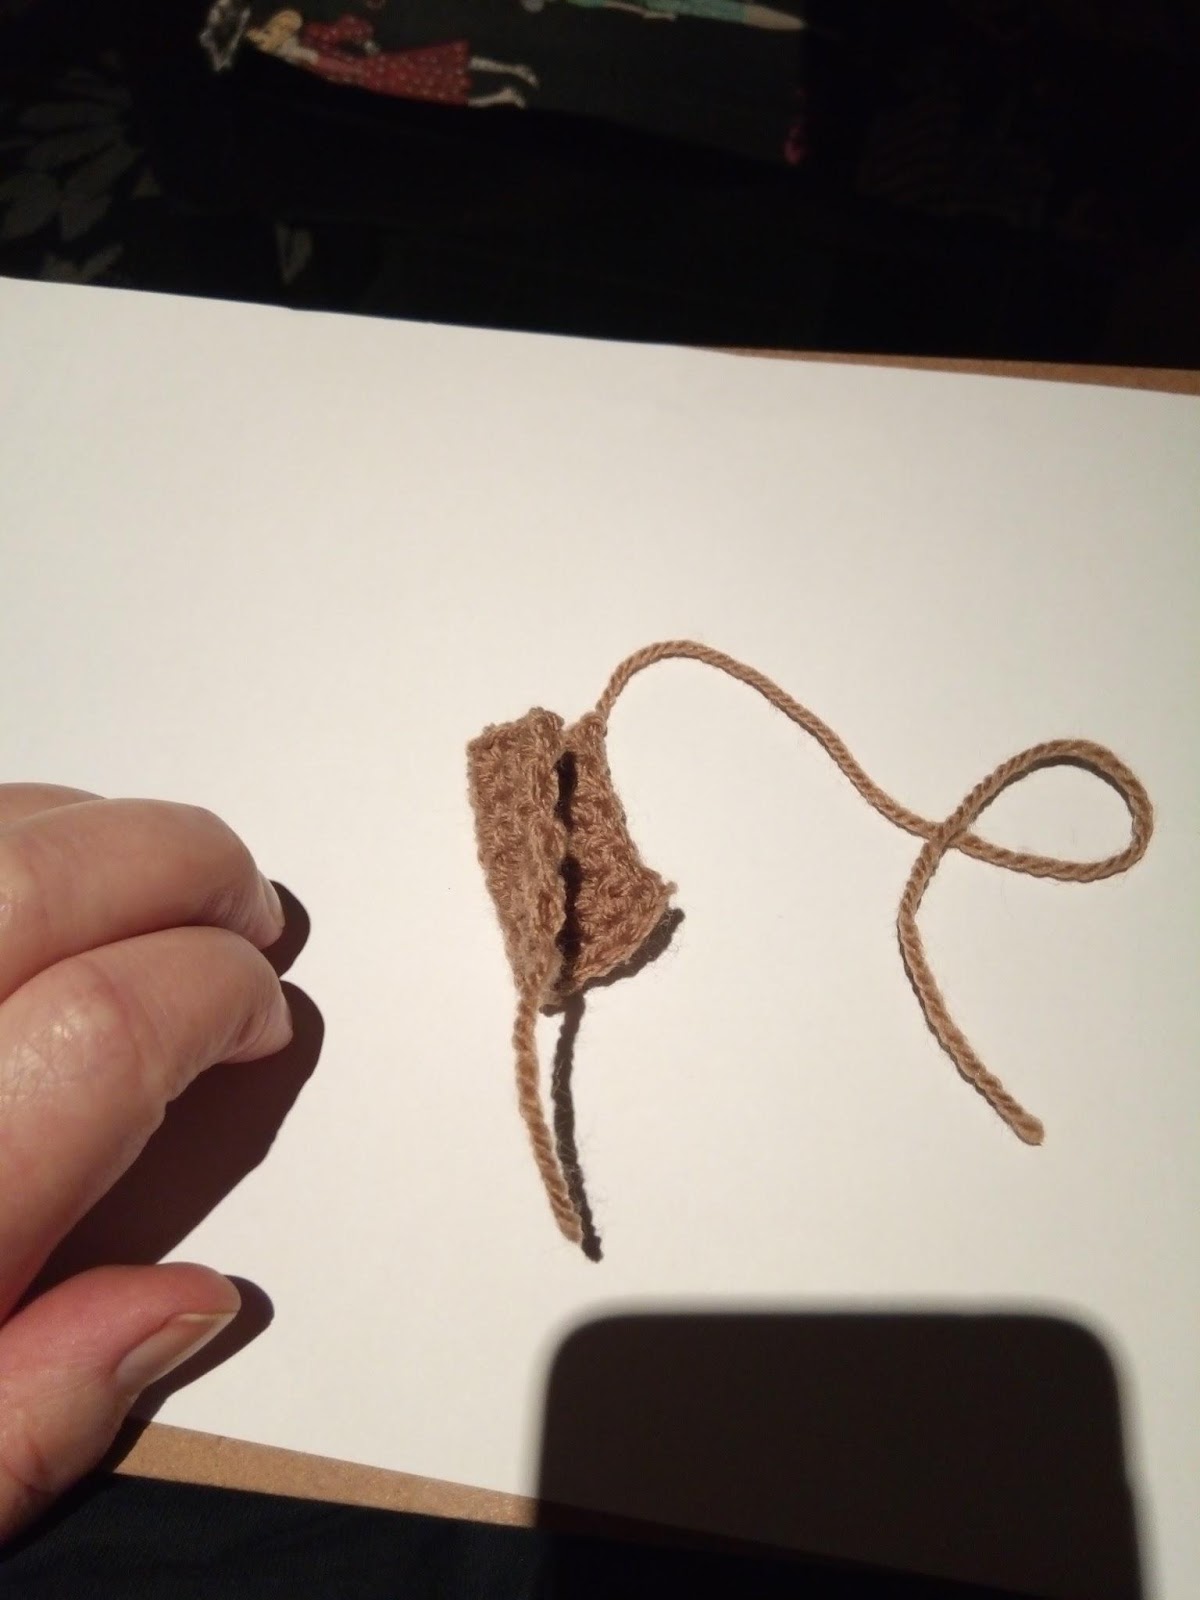
2 Arms: 8st x 8rows square               fold in half               sew down side and 

    across the bottom

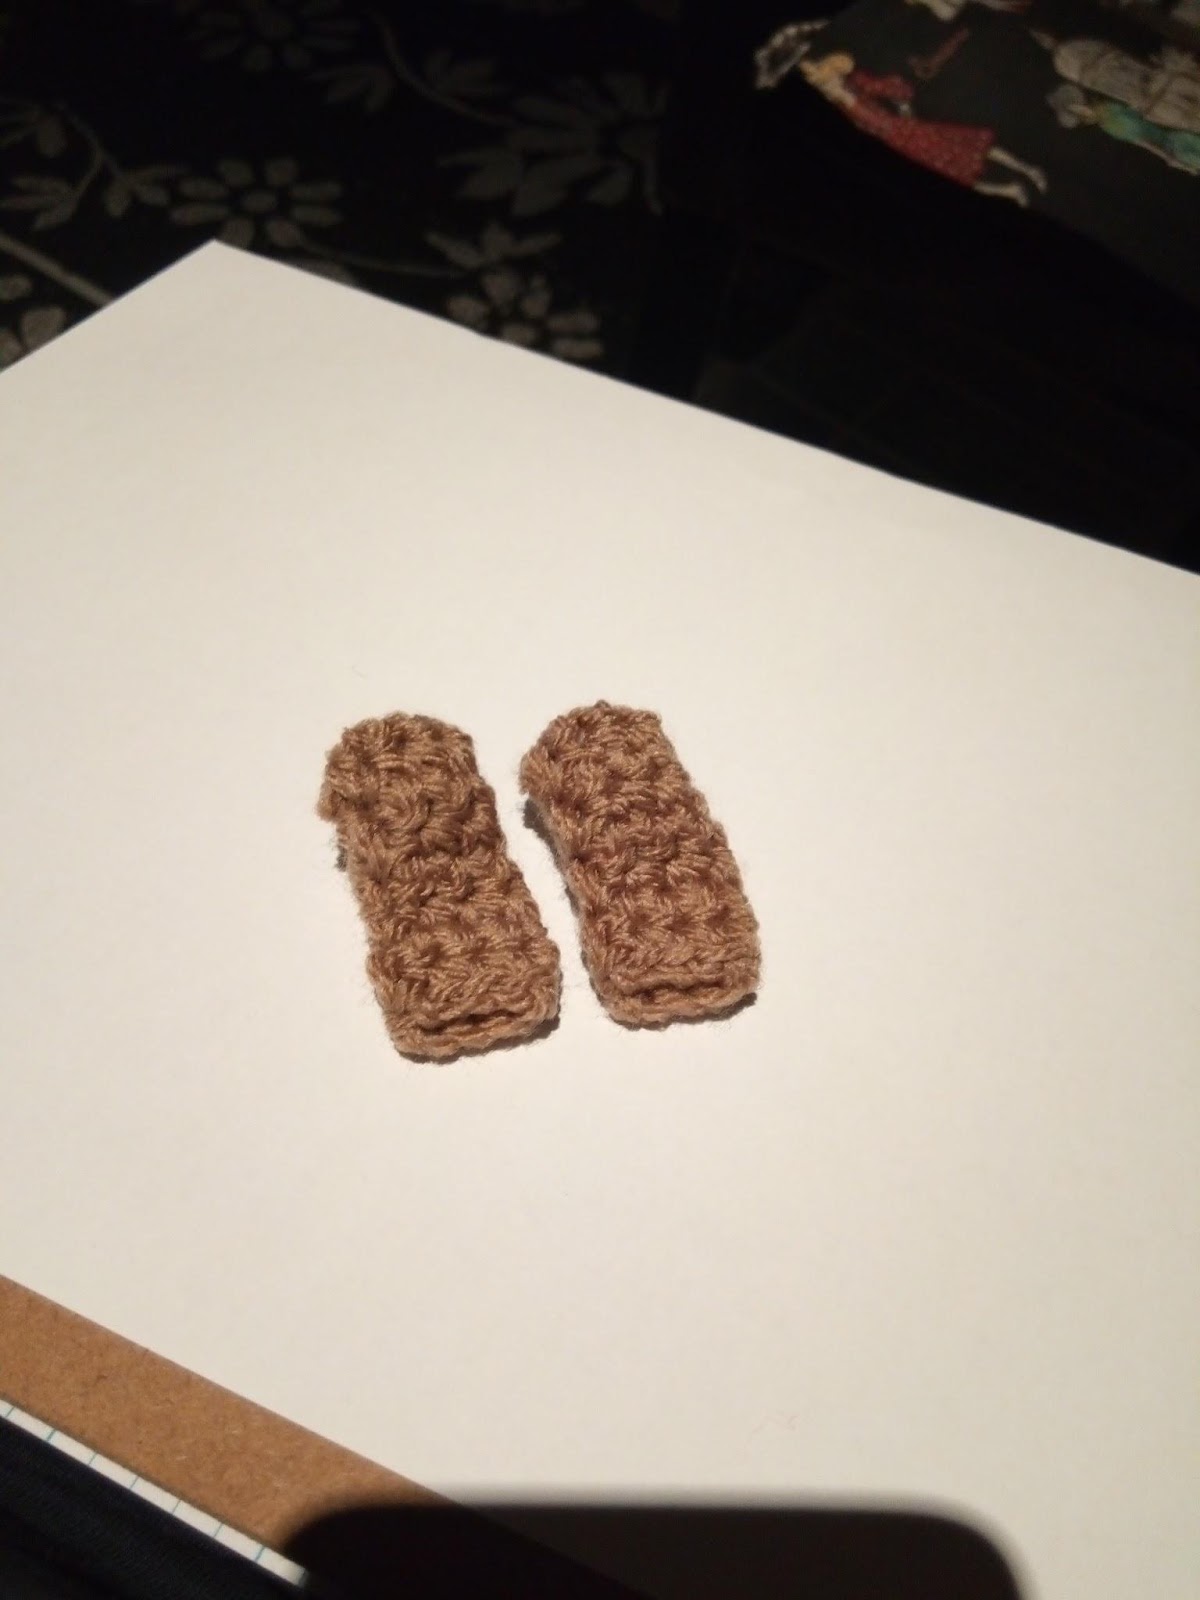
     Wee bit of stuffing in each 2 arms done.


Leg 1: 12st x 8 rows   Leg 2: 12st x 8 rows

Fastened off with tail       Not fastened off…  
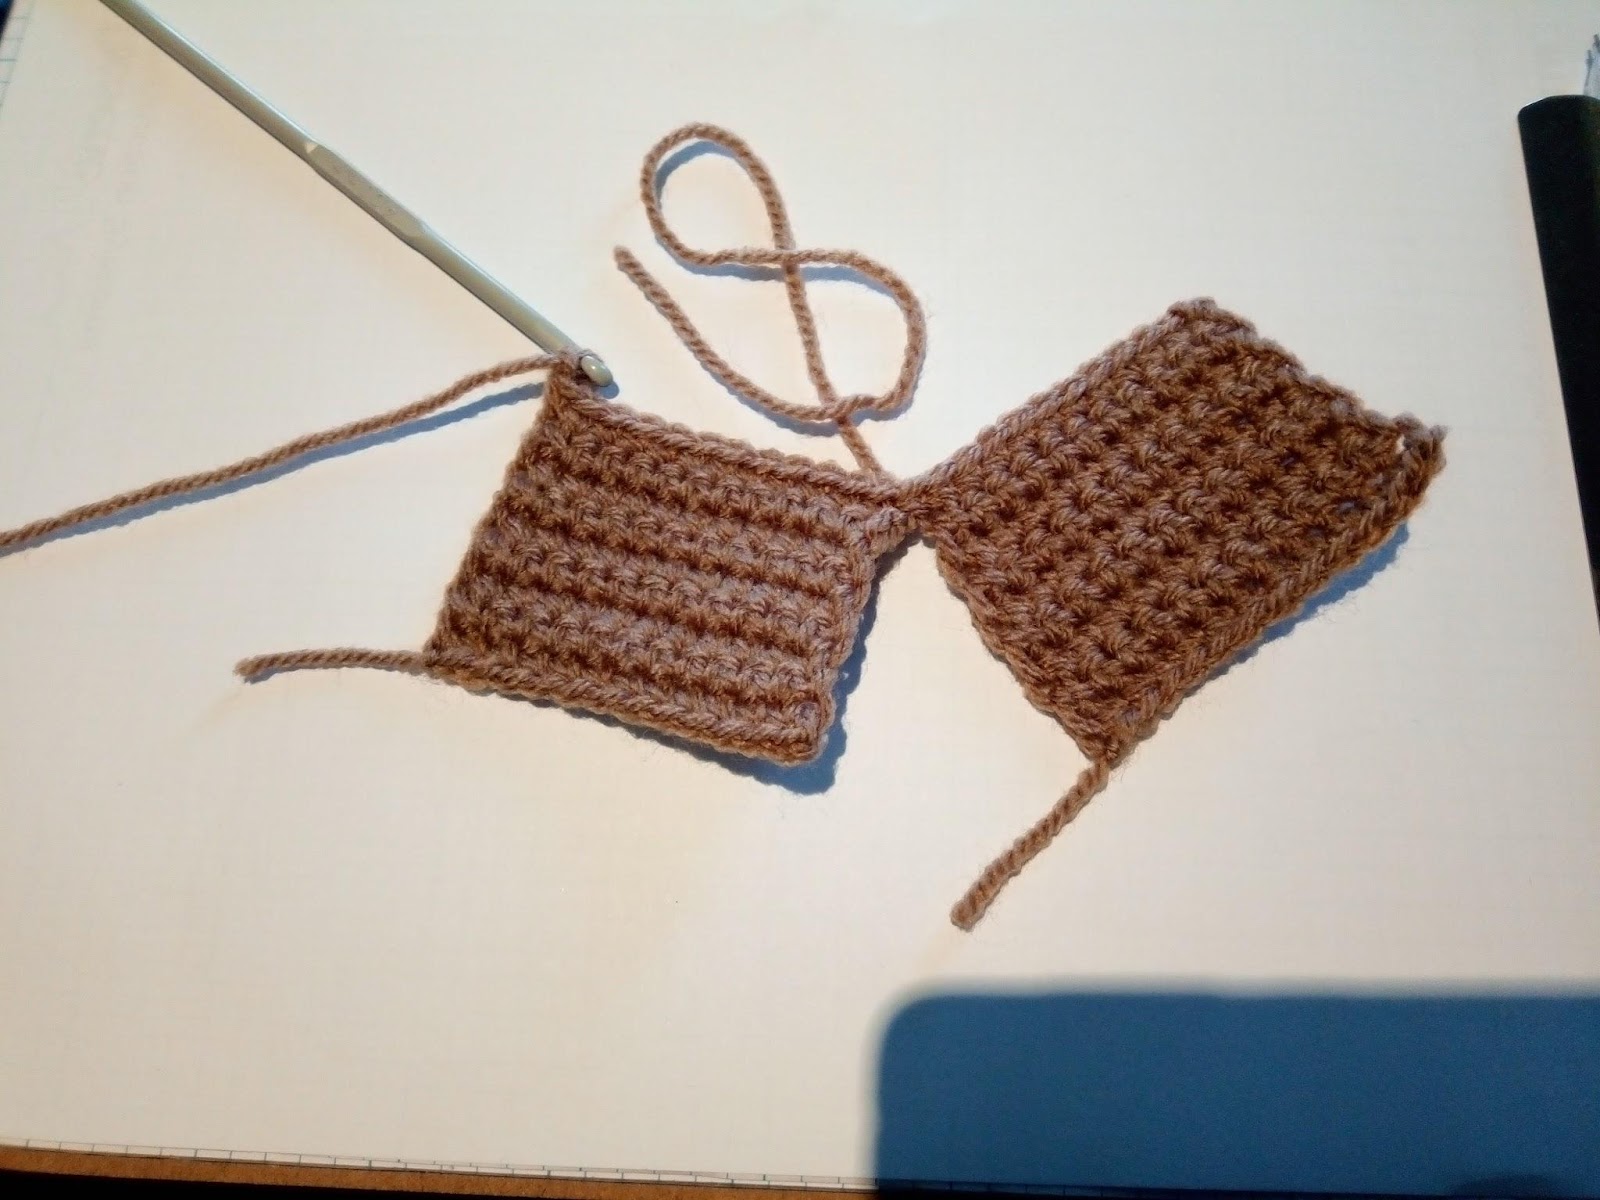


Row 9)  Work across both pieces = 24sc

Row 10-17) work 24st, straight.   
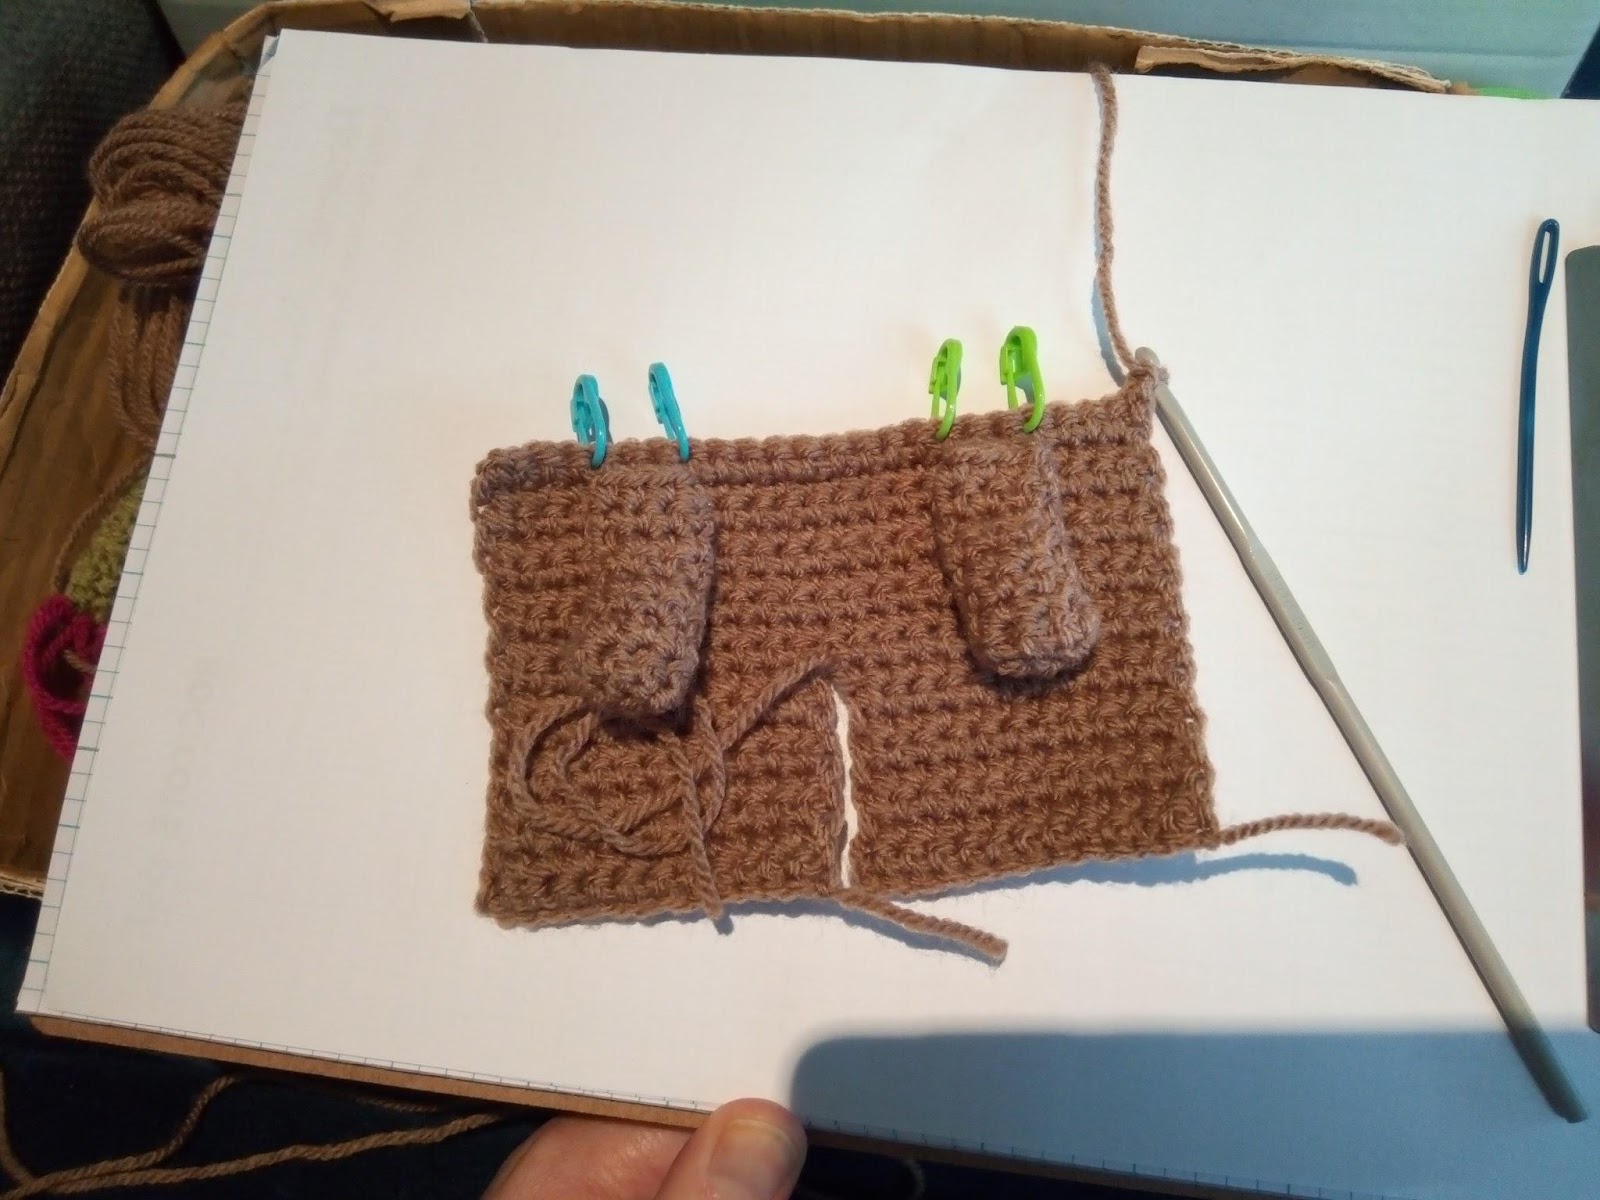

Row 18) include the arms row. Stitch markers indicate the stitches that will be used with the arms just sitting there to show you where they will go.
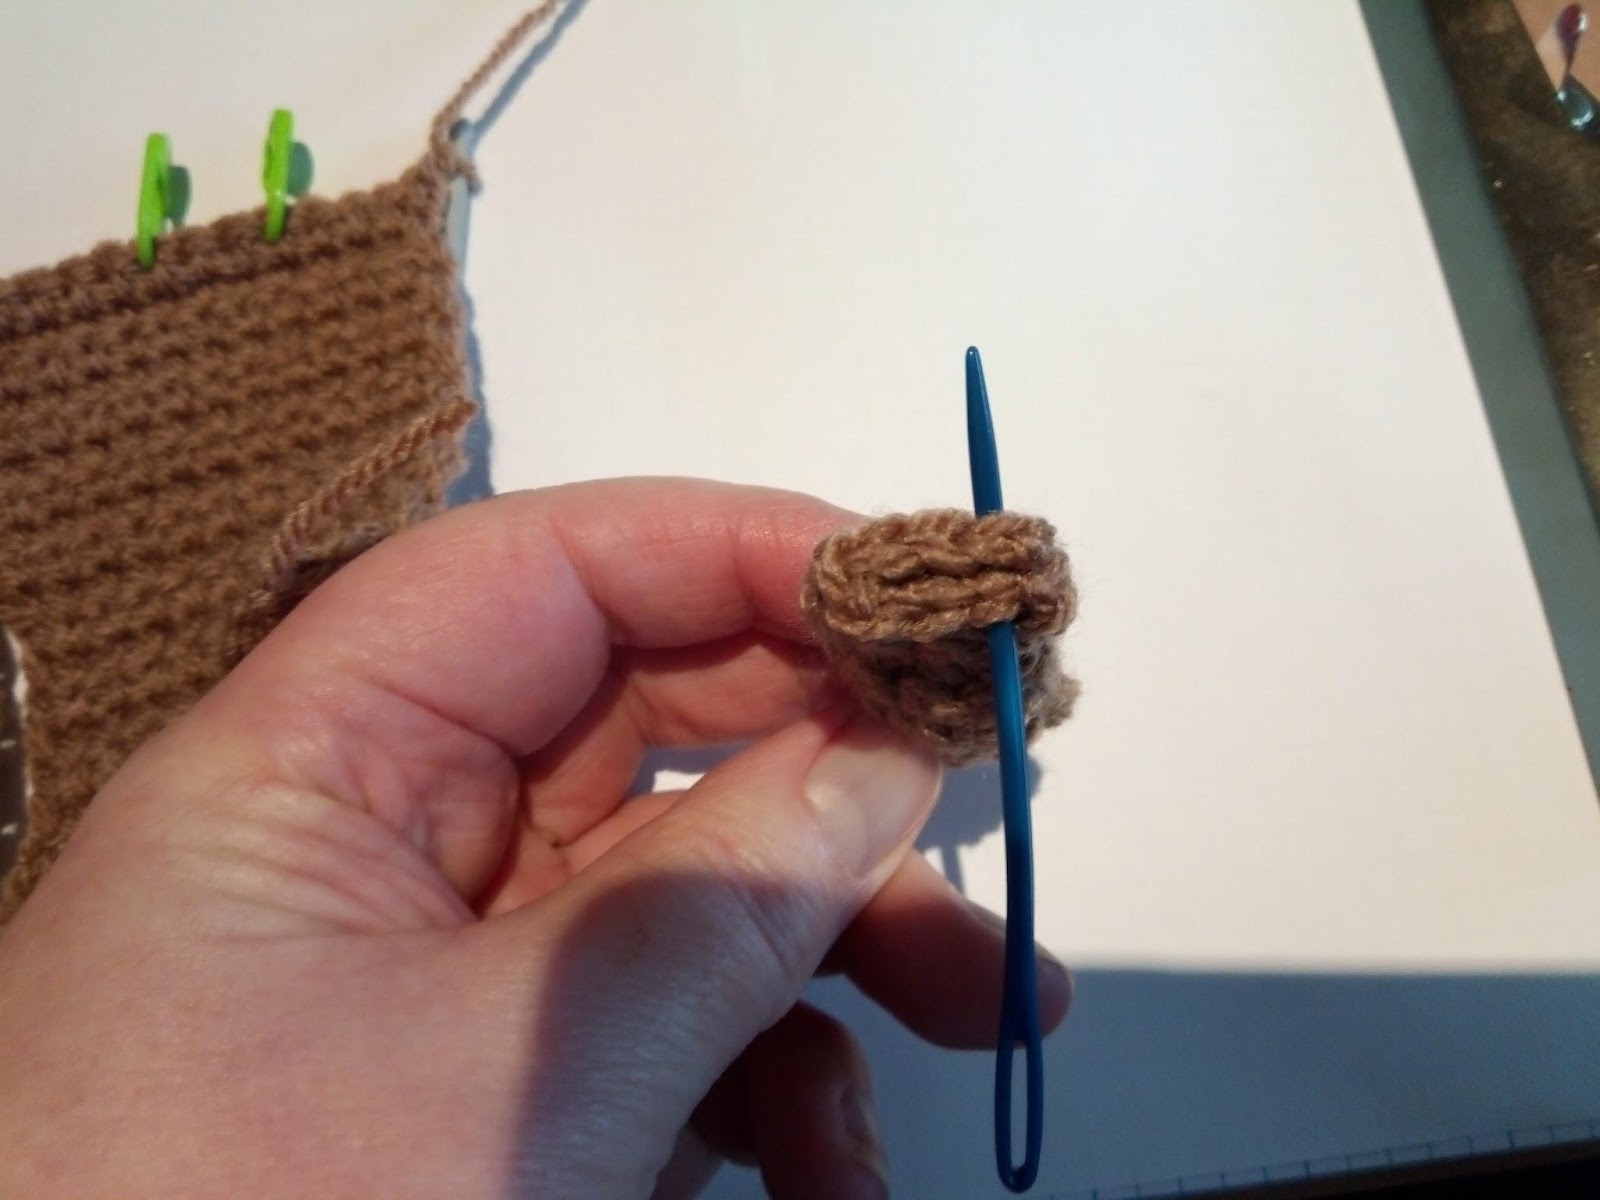
Row 18) ch1, sc3, then insert the hook through the arm first (shown with my blue needle here) then through stitch number 5 (first green marker) and complete that sc. Do 3 more times to finish that arm. Sc the 8 in between markers and repeat the arm attachment procedure over the next 4 stitches. And then it’s just the 4 sc to finish the row. 
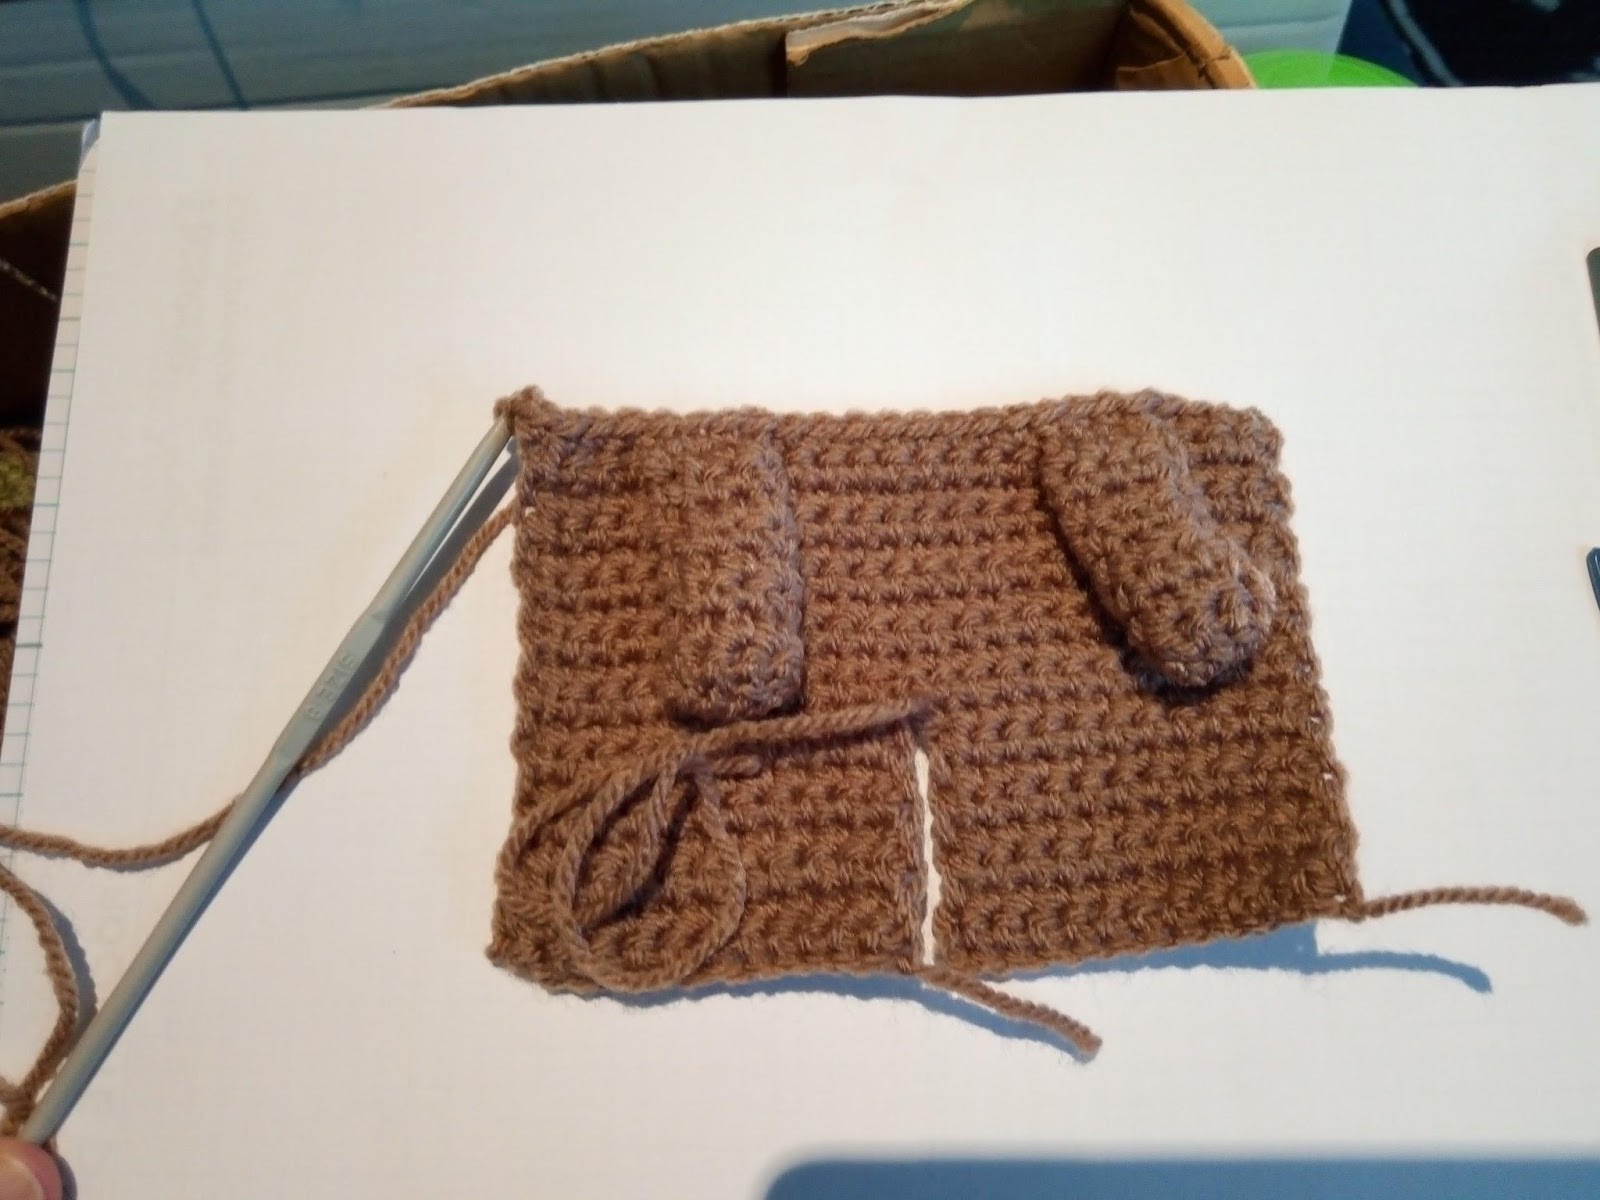
Row 18 done.


Close up of arm bit.
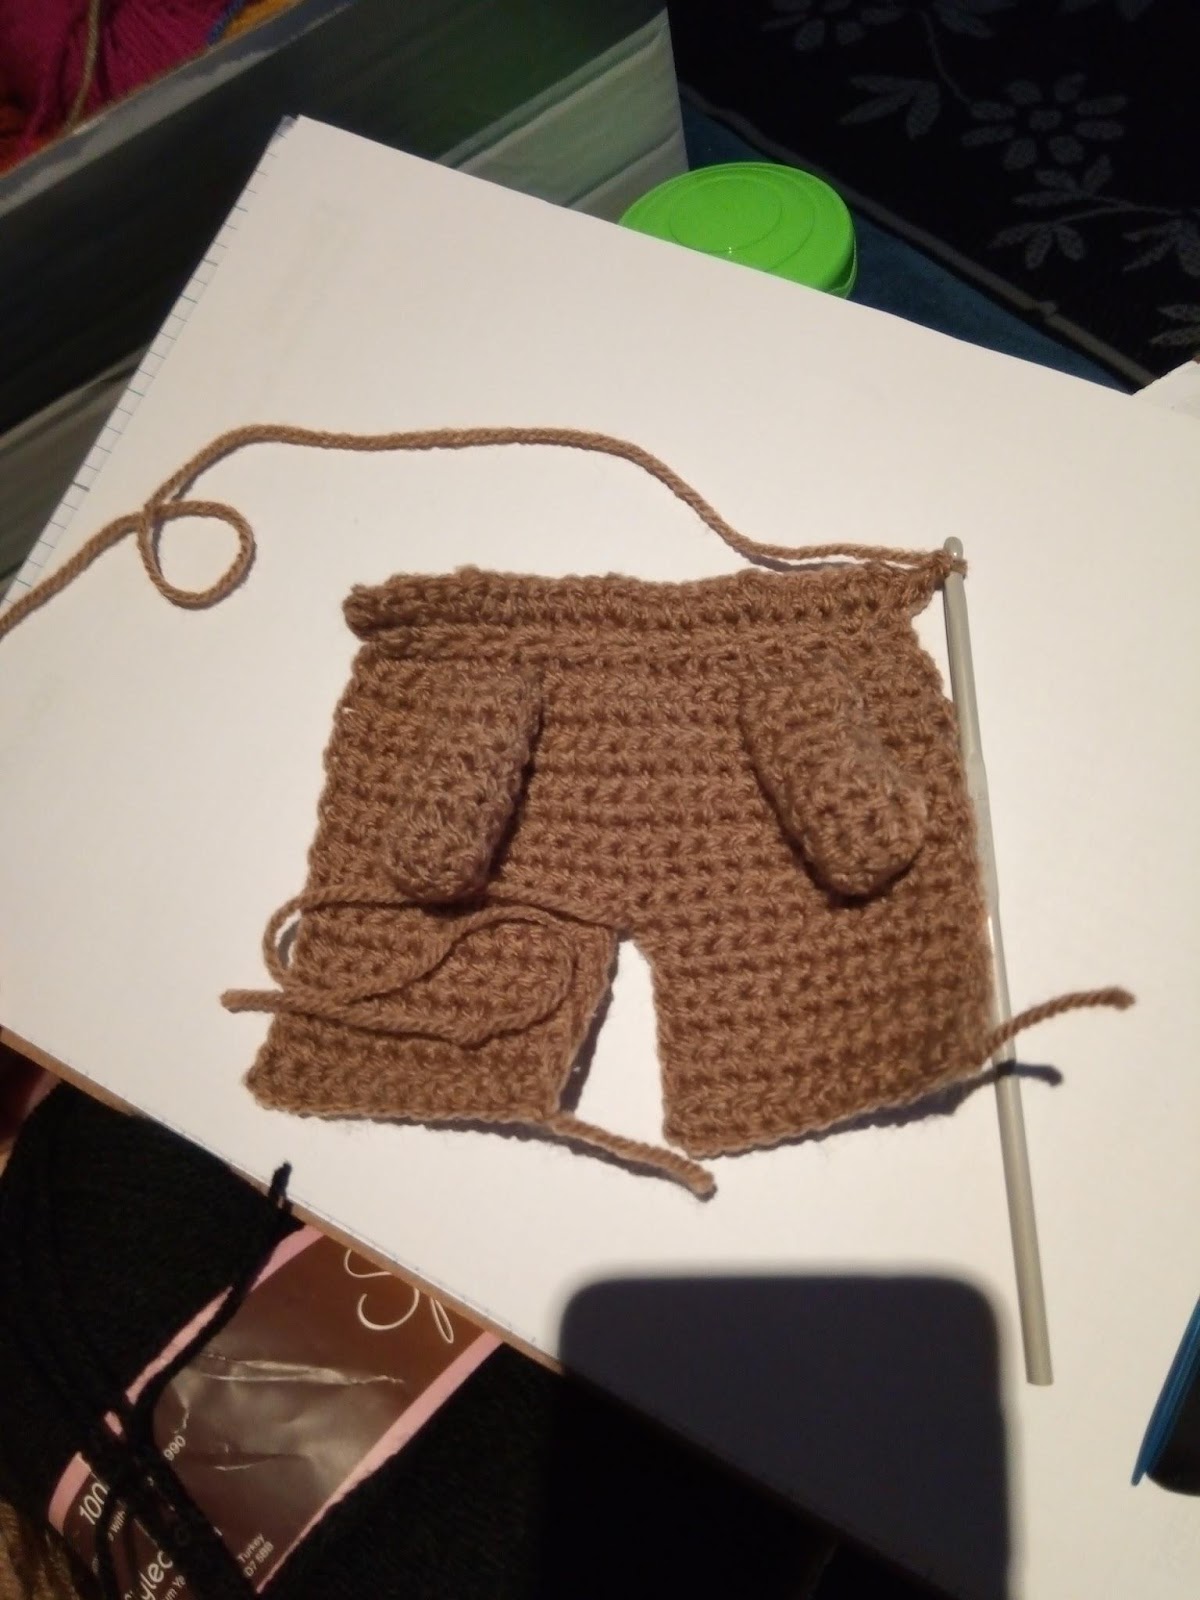


Row 19 & 20. Close up of the decrease for the neck followed by the increase back to where you were.
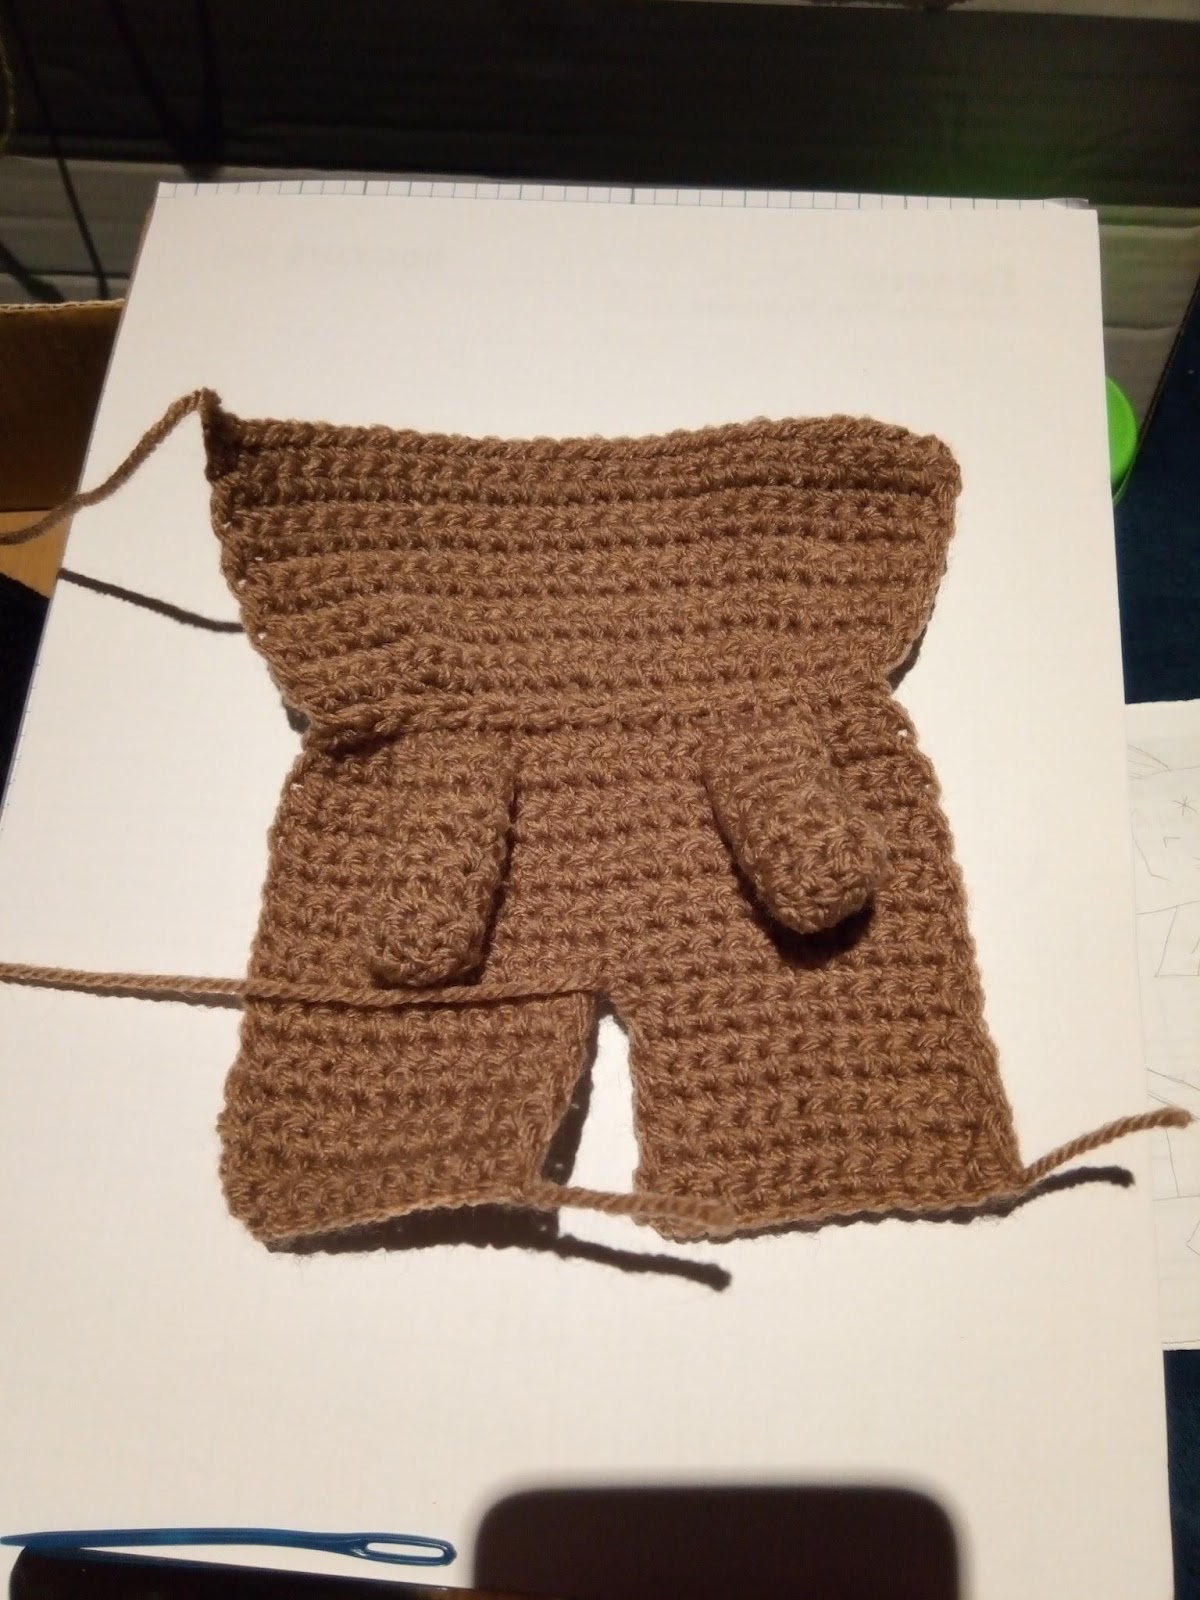
This pulls the neck in nicely without having to throttle the poor wee thing!


Then just finish up the head rows working straight again  …


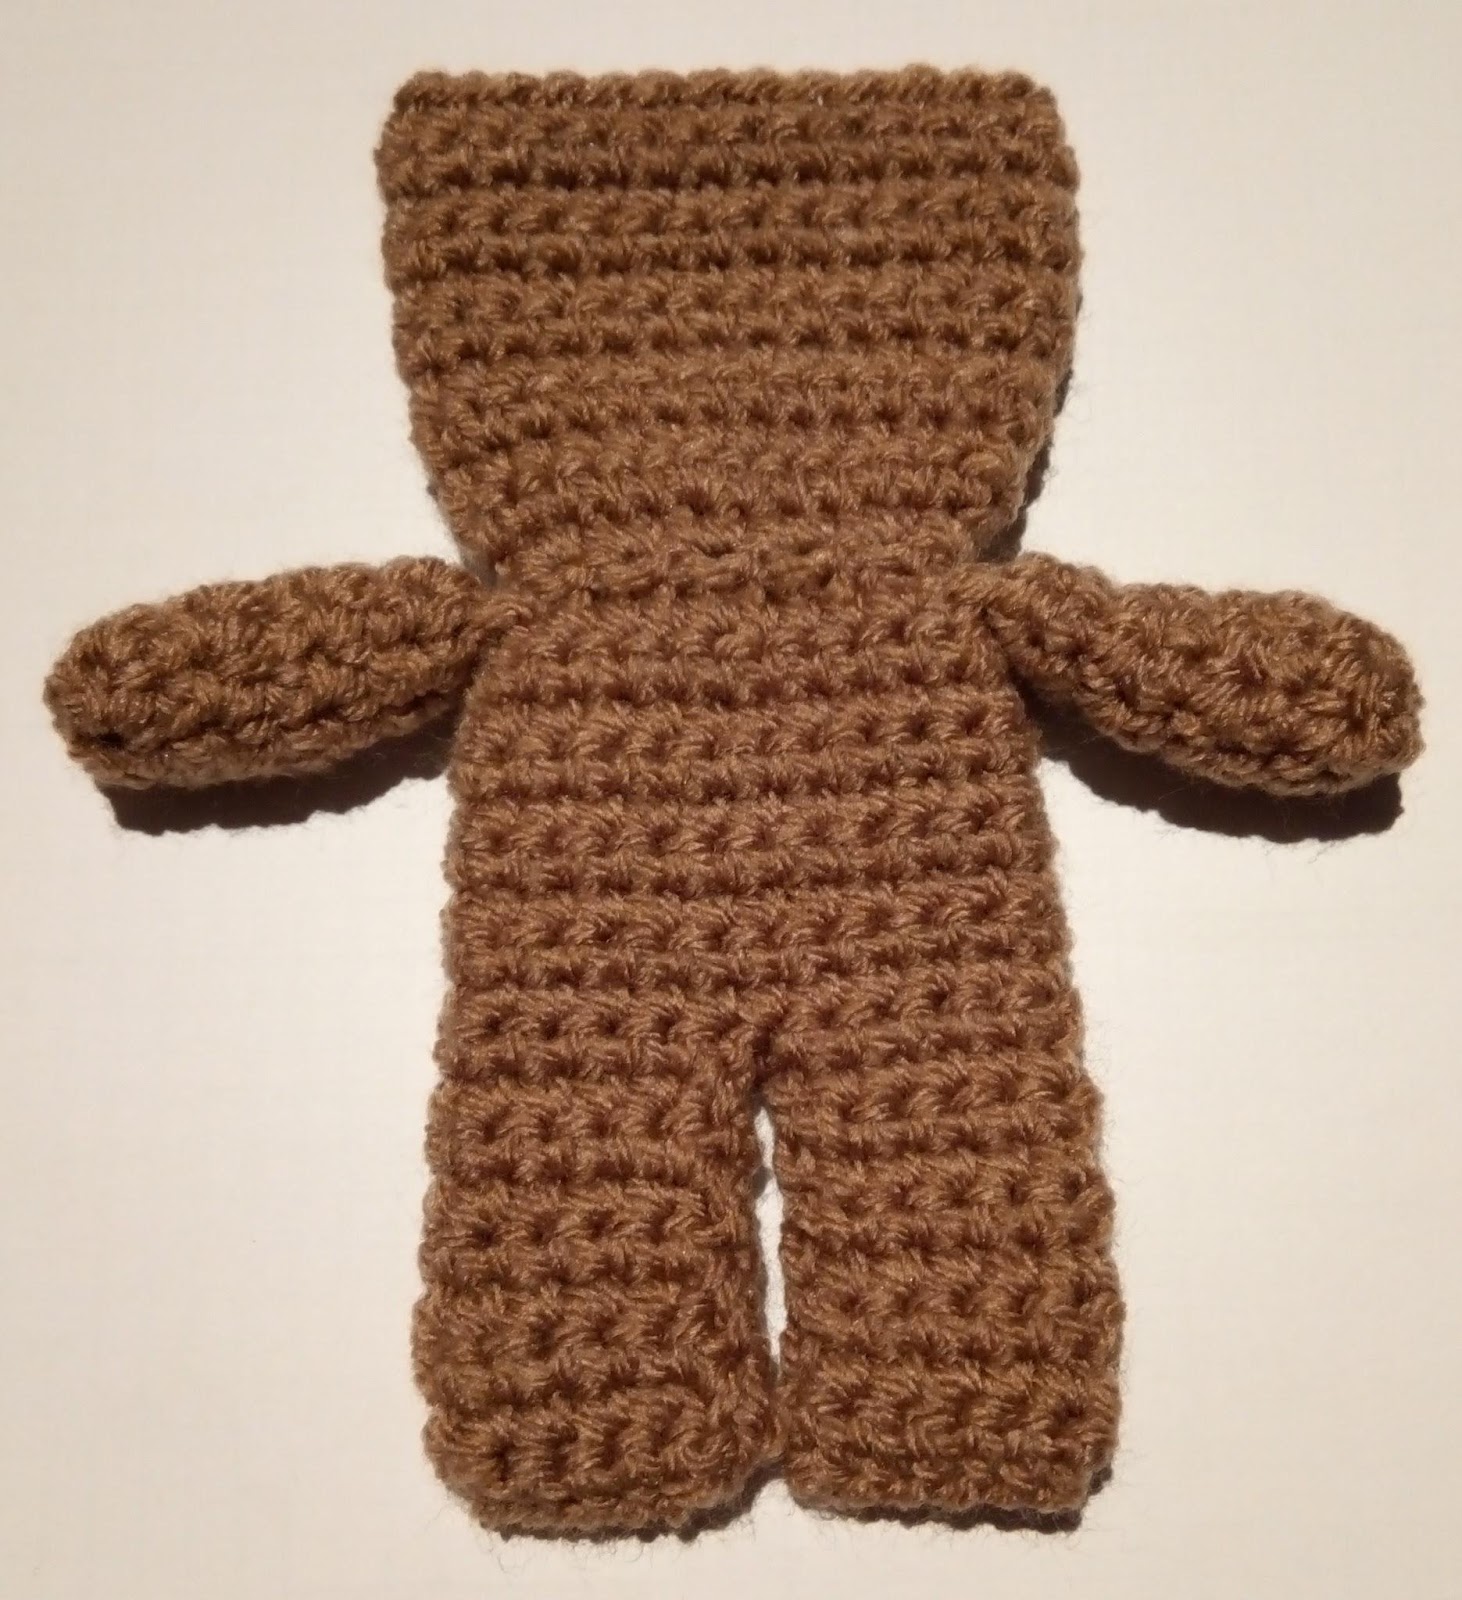
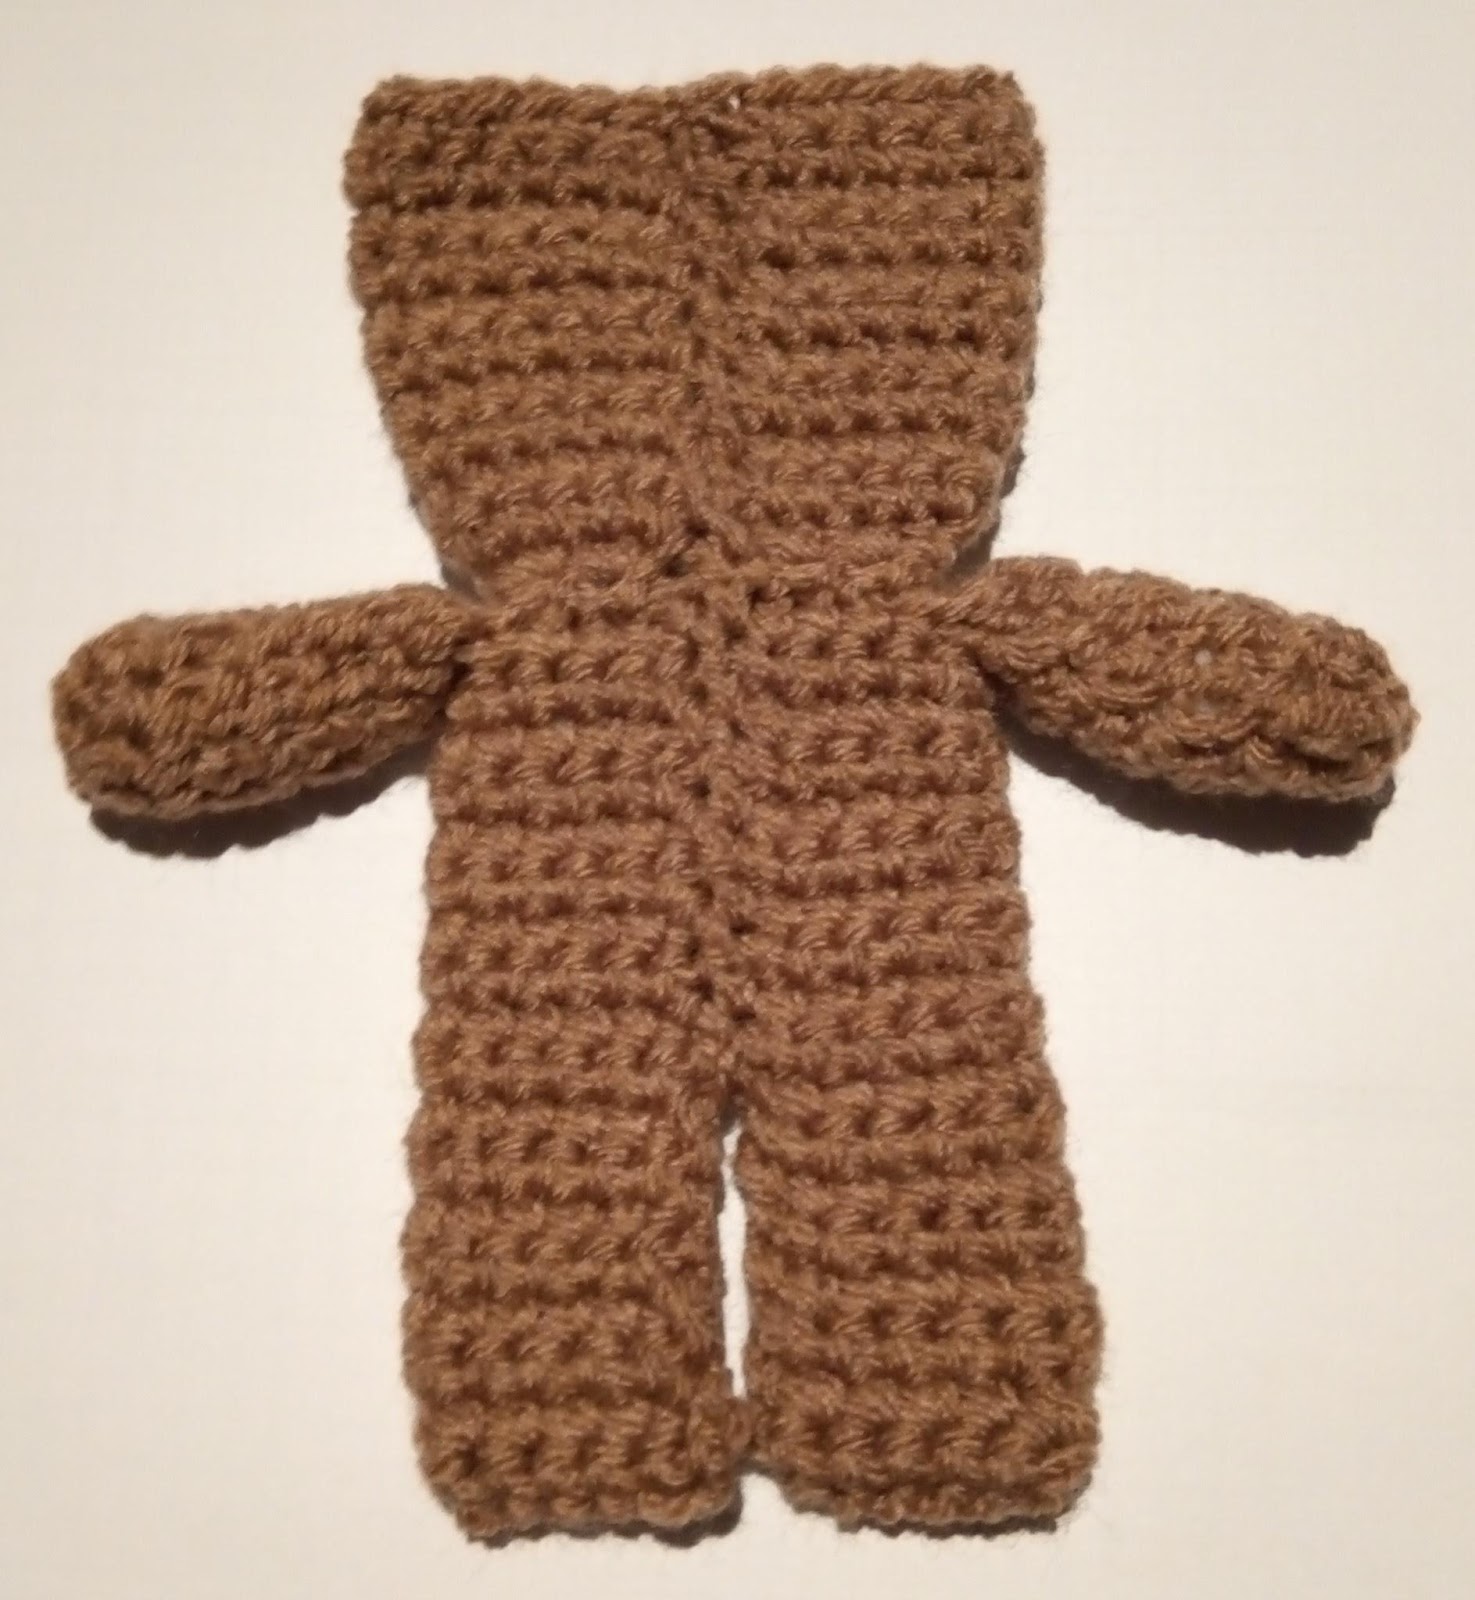
And now the crocheting is done! Doesn't look much..  

  Fold it in half and it looks a bit like a doll.


Now for the sewing up.
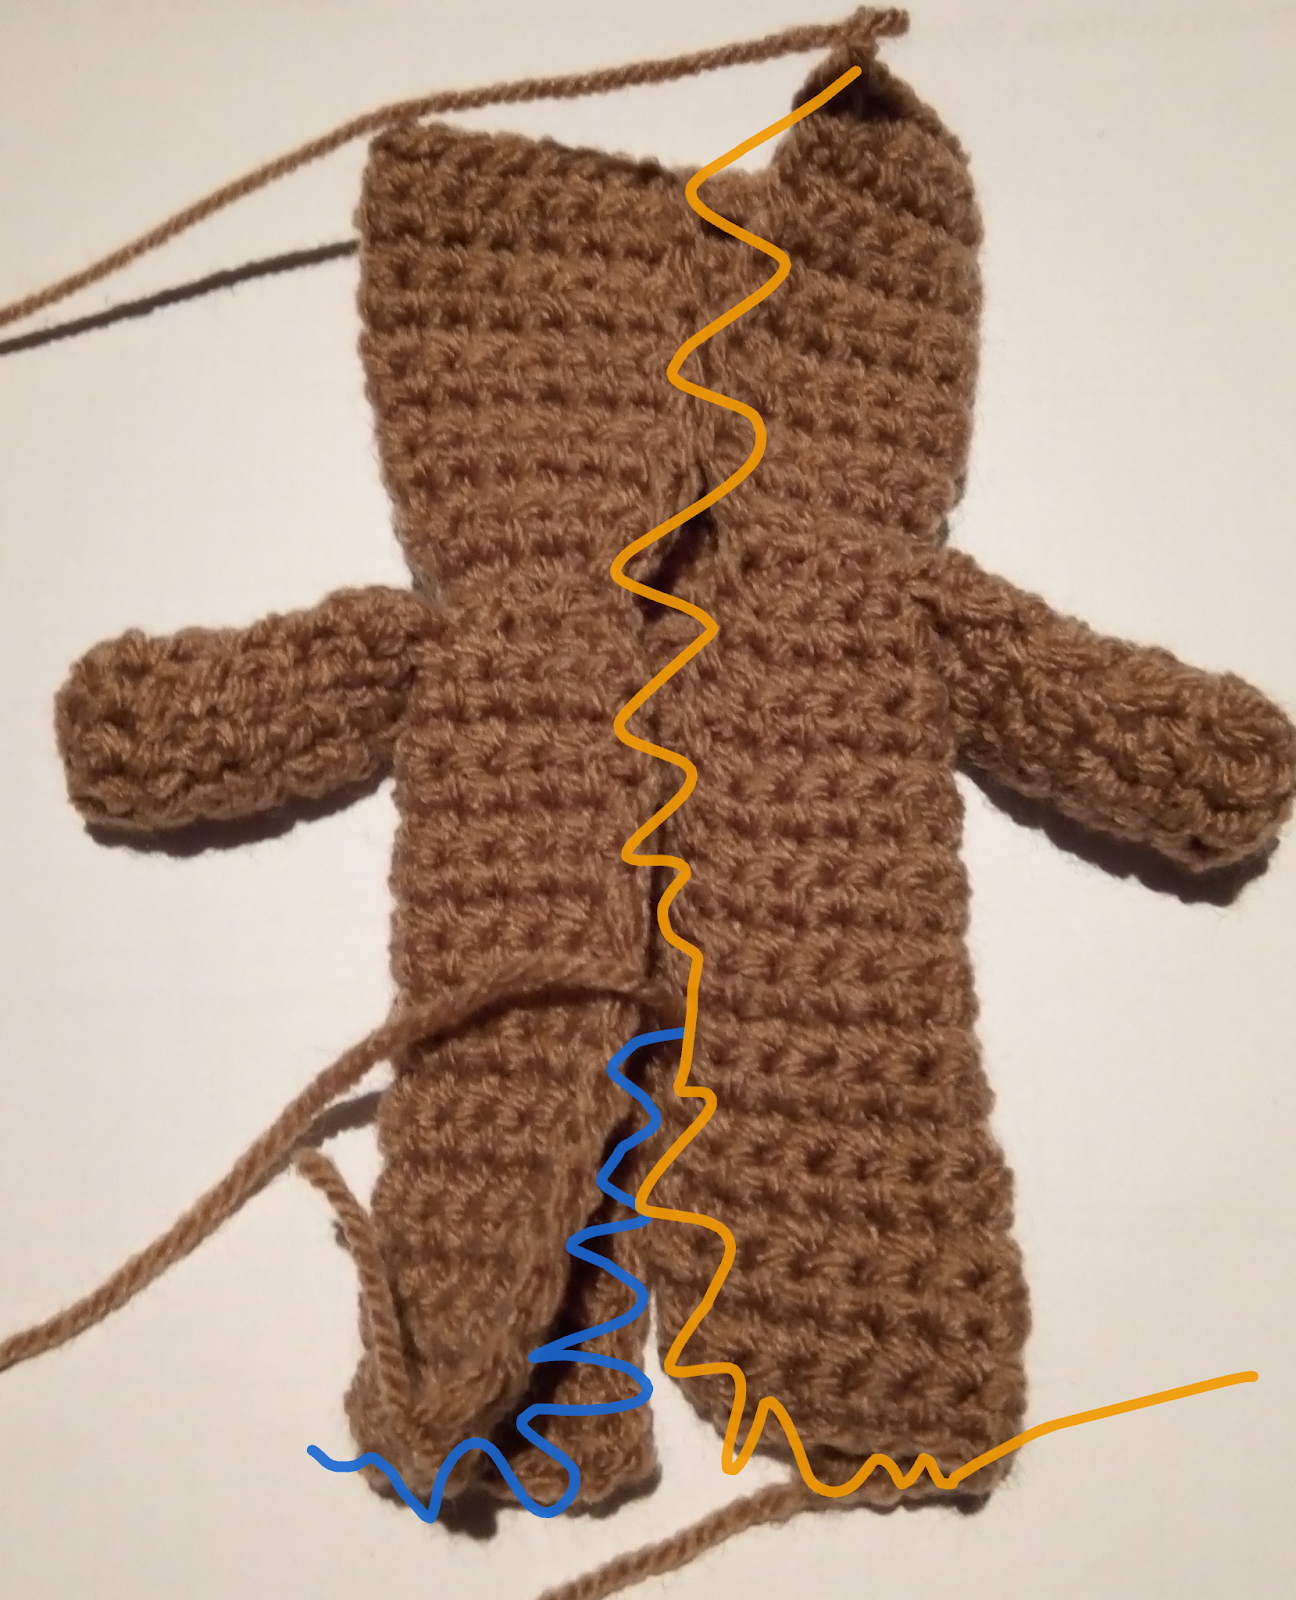
 

If you do the one leg first (blue squiggle) then it’s easier to 

see where the centre back becomes the second leg.

Yellow squiggle is the second line of sewing.
Back and Front.  

All sewed up and looking more like a doll!
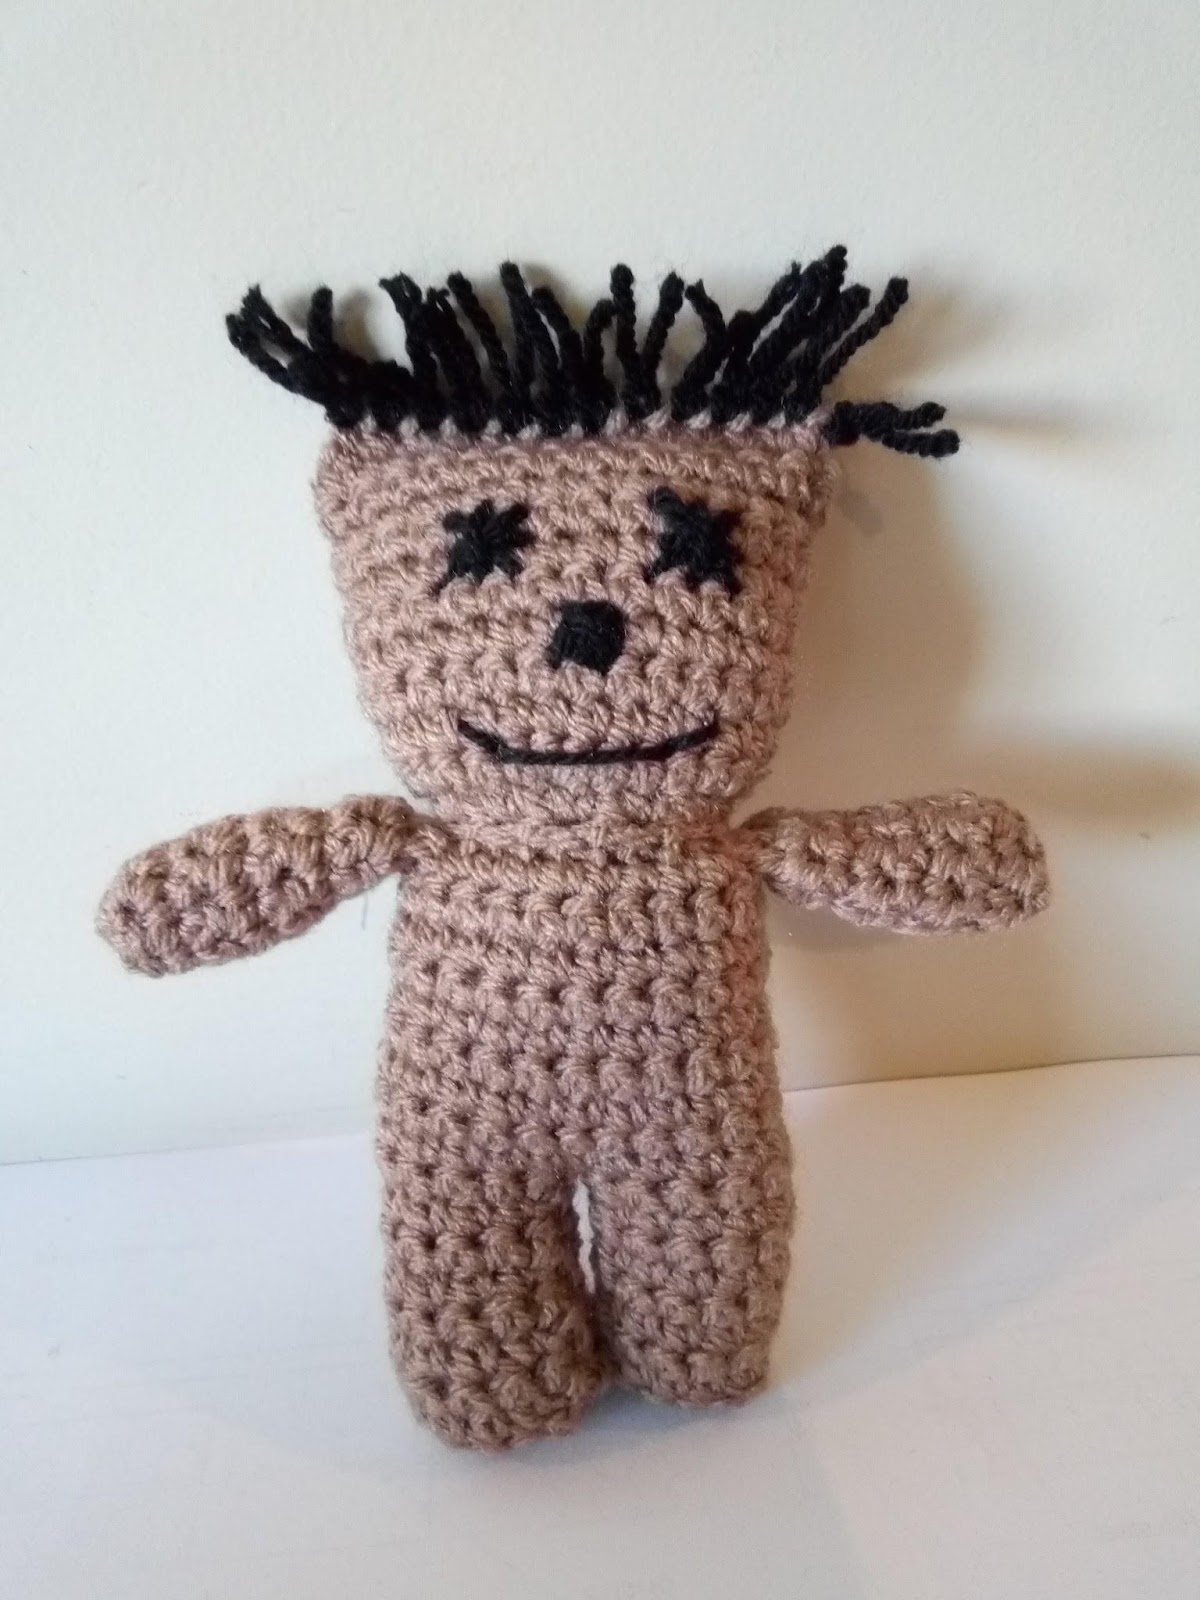


I find it easiest to do the face now.

Although I’m really not very good at faces!


     Stuff, then complete row 31 to close.  Add some hair if you want and DONE.


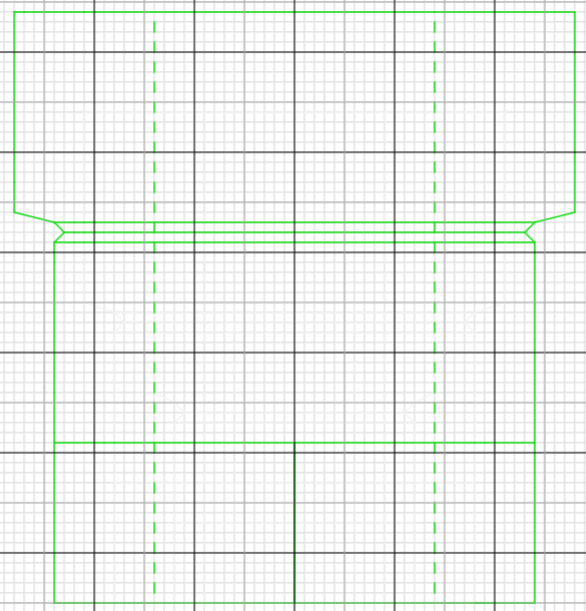
Charts

These are useful if you want to work out a particular colour scheme.

1 square = 1 stitch/row. Dashed line is the fold line


HAVE FUN!!!